
Explore and Challenge: The Pi-Stop Traffic Light Sequence
Pi-Stop Resource Files
These Pi-Stop resource are available as fully customisable Markdown documents on the Pi-Stop github page.
Each of the guides are also available in PDF format, and in several other automatically generated variants (for example, this includes versions which have instructions for the Model Plus only, or the original model).


Explore and Challenge:
The Pi-Stop Traffic Light Sequence

SEE ALSO:
Discover: The Pi-Stop: For more information about Pi-Stop and how to use it.
Setup: Scratch GPIO: For instructions on how to setup Scratch GPIO with Pi-Stop (which is needed for this section).
Explore and Challenge Scratch GPIO: Pi-Stop First Steps: If you’ve not used Scratch before, this will provide a quick introduction to building your first Scratch GPIO program.

In this guide we make use of Scratch GPIO produce a standard traffic light sequence with the Pi-Stop.
Getting Started
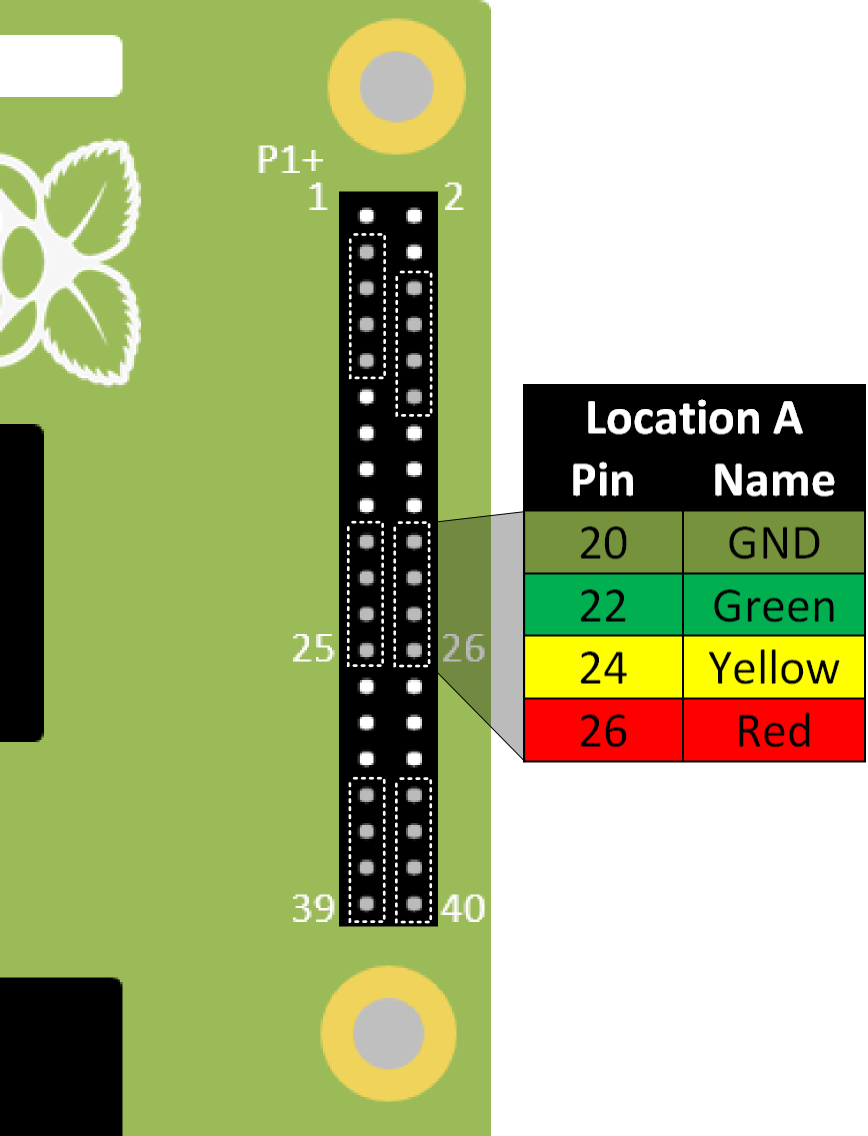
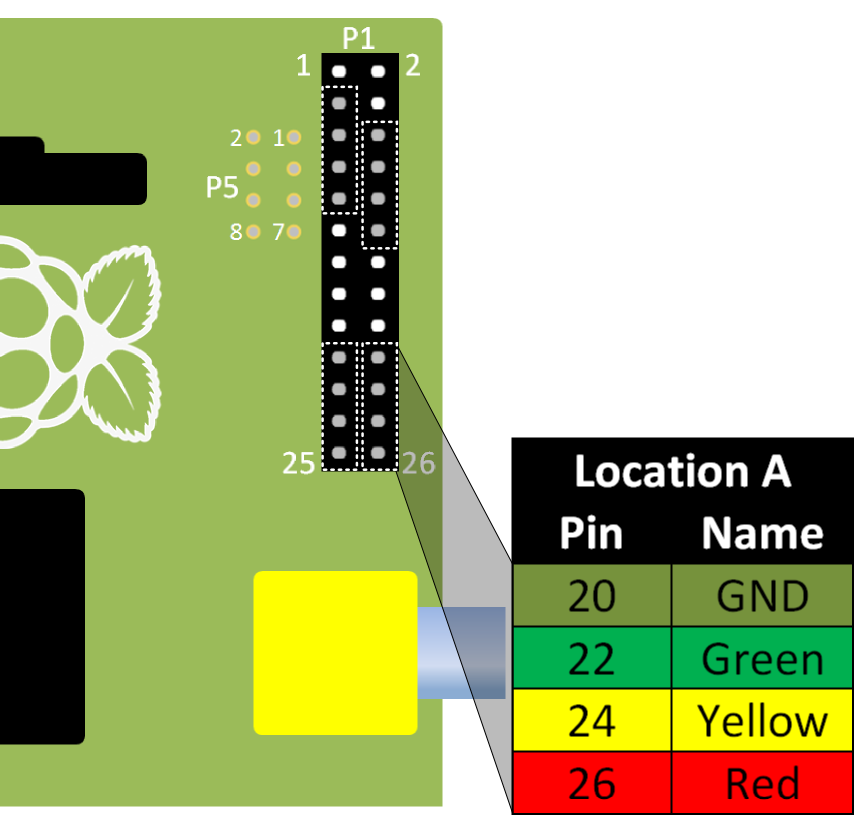
The Pi-Stop should be connected to the Raspberry Pi in Location A, as follows:
Location A for Model A+ or B+ (purchased after July 2014)
Location A for Model A or B (purchased before July 2014)
With the Pi-Stop fitted in the correct position you can now power up your Raspberry Pi.
Run Scratch GPIO
If you are still in the Raspberry Pi terminal, start the desktop environment using:
`startx
`
Open Scratch GPIO from the desktop using the Scratch GPIO icon (we do not need the ScratchGPIO 5 Plus):
Scratch GPIO 5 is the standard version, while Scratch GPIO 5 plus provides additional support for several add-on boards.
NOTE: If you are using X-Forwarding, you can run Scratch GPIO with the following commands:
sudo cp ~/.Xauthority ~root/

sudo ~/scratchgpio5/./scratchgpio5.sh
Get ready
In this example we will use the following blocks, all of which are located in the control section:
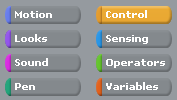
We will use one or more of the following:
- broadcast blocks

- wait blocks

- when I receive blocks

- forever block
NOTE: For more information on the broadcast, wait and forever blocks see
Explore and Challenge Scratch GPIO: Pi-Stop First Steps which introduced them for the first time.
Designing our traffic sequence
Before we go any further we should take some time to work out what the correct sequence of lights a traffic light should show. This way we can design our program and then test to see if it behaves as we wanted.
The STOP Sequence

QUESTION: When a traffic light is GREEN (GO) and starts to change, what lights will be lit as it changes to STOP the traffic?
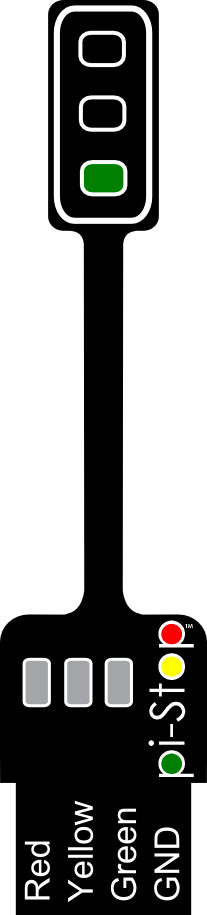
![]()
![]()


WORKSHEET: On your worksheet colour in the correct traffic light sequence, starting with GREEN (as shown above) and ending with the light showing STOP.
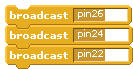
WORKSHEET: On the broadcast blocks fill in the required commands to switch on or off the appropriate LEDs (by switching on or off the pins),
The GO Sequence
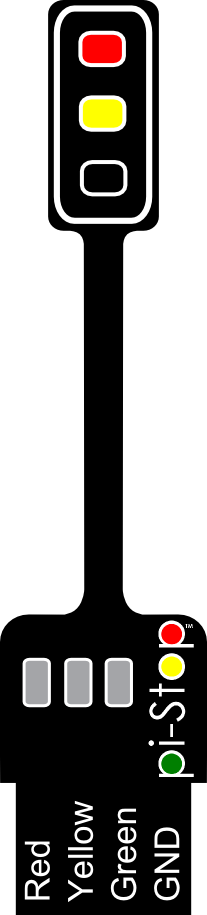
QUESTION: When a traffic light is RED (STOP) and changes to GO, what is the normal sequence of lights?
Again, fill in the required broadcast commands.
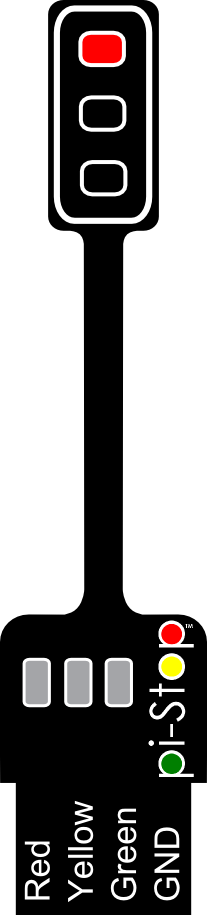
![]()
![]()
WORKSHEET: On your worksheet colour in the correct traffic light sequence, starting with RED and ending with the light showing GO.
WORKSHEET: Again, complete the required broadcast blocks to switch each of the lights on or off.
Great work!
You can now create each of the broadcast blocks in Scratch and click on them to test each step.

Putting the blocks together
We will now create a new broadcast group of blocks to recreate the required LED sequence.
The broadcast STOP Block
Start the group with a when I receive block called STOP:

Add our first light change:
Add a wait block (so the lights do not change instantly):
Add our second light change:
Broadcast GO Block
Simply do the same with the other light changes, but call this when I receive block GO:
Excellent! Now you can test these blocks by clicking on them directly and see if we have our correct traffic light sequences!
WORKSHEET: Tick the checkbox marked “I’ve created the Pi-Stop STOP and GO sequences”
The Final Program – Changing Lights
At the moment our program will not do anything unless we click on it.
Just like we did in the previous guide Explore and Challenge Scratch GPIO: Pi-Stop First Steps

We will also add a when green flag clicked block to kick off our sequence (allowing you to use the small flag in the top right to start, and the red circle to stop.

For our traffic lights we want them to start by changing to GO (by broadcasting “GO”) then wait for some time (for example 10 seconds) and then change to STOP (by broadcasting “STOP”).
Putting the blocks together we end up with:

When you run the program (by clicking on the Green Flag) you will see each part is highlighted with a white outline while it runs through the forever loop and runs each of the broadcast group blocks GO and STOP.
WORKSHEET: Tick the checkbox marked “I’ve created the Pi-Stop the full Traffic Light Sequence”
Remember to save your completed work by selecting File and Save As… from the menu.
Behold the Changing Lights!

Try your own projects…
Now you have your very own traffic light you can use in your own projects!
Below are some ideas, or you can move onto the next guide:
Explore and Challenge Scratch GPIO: Pi-Stop Reaction Game
Start a race

IDEA: Fed up with unfair starts when starting a race? Why not start your races with your own starting lights!
Use the Pi-Stop to start your Scalextric (TM) or Hot Wheels (TM) races, ensuring everyone gets a fair chance.
QUESTION: Can you create a Formula 1 style starting lights (where each light lights up and they all go off, the race starts when the lights are off).
QUESTION: Can you change the program to make the light change with a random wait time (making it harder to go before they change)?
Hint: See the next guide (Explore and Challenge Scratch GPIO: Pi-Stop Reaction Game which makes use of random delays.
WORKSHEET: Tick the checkbox marked “Extended Task: Created a racing start light control”
Control multiple Traffic Lights
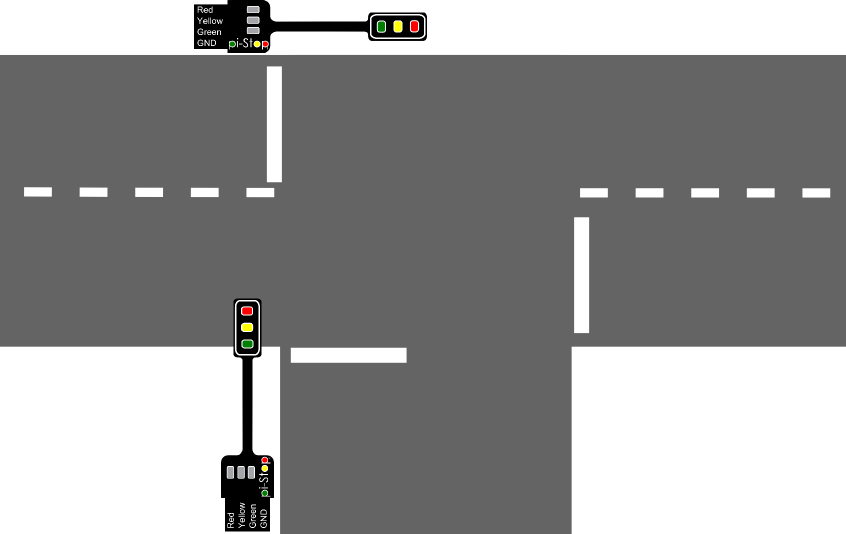
IDEA: Perhaps your LEGO City (TM) needs some traffic control.

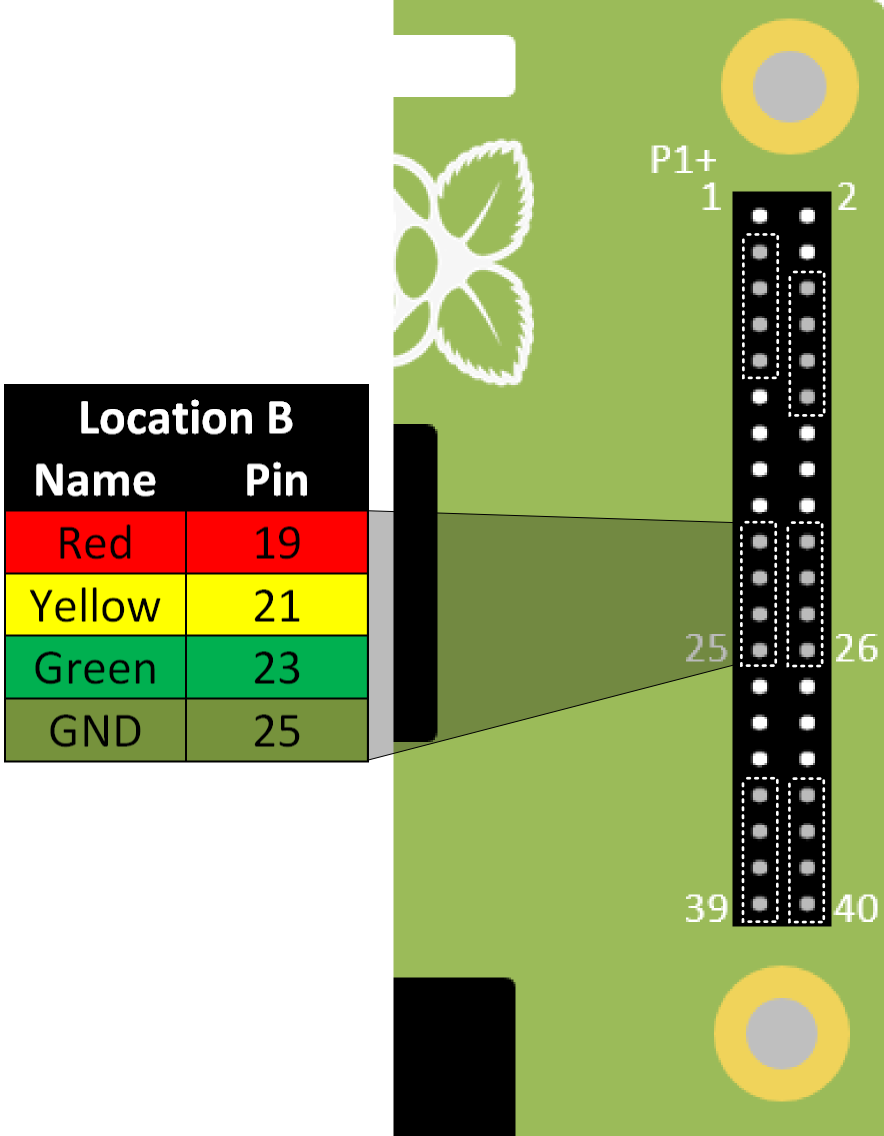
QUESTION: Can you extend the traffic light sequence to use a second Pi-Stop fitted in Location B so you can control traffic at a junction?
Location B for Model A+ or B+ (purchased after July 2014)
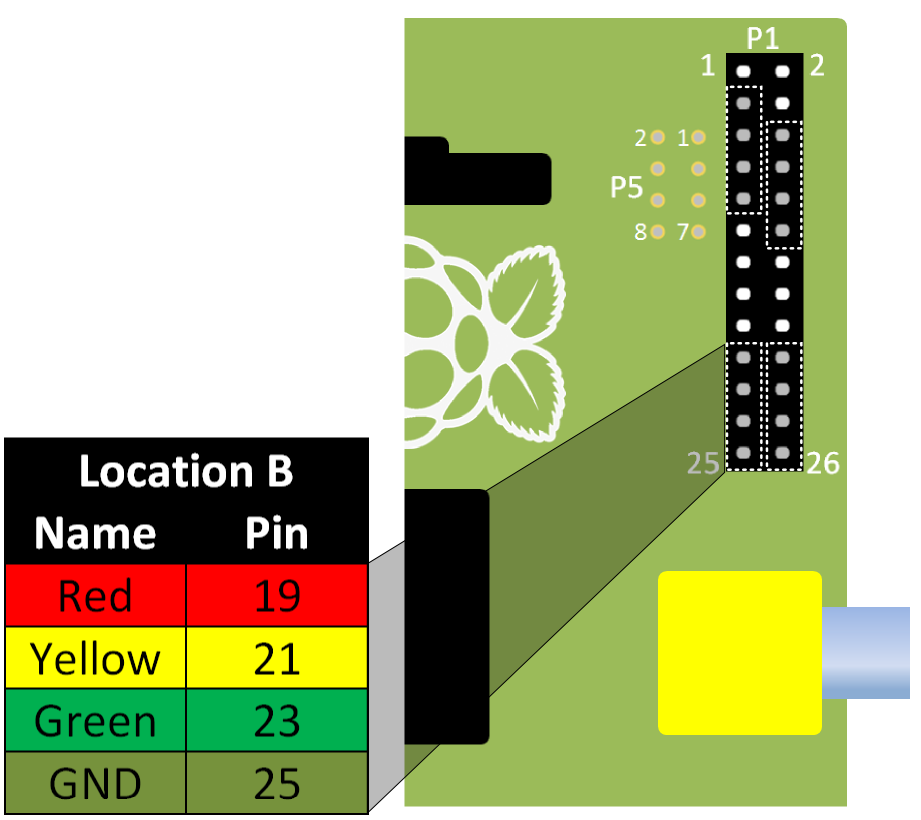
Location B for Model A or B (purchased before July 2014)
If you want to try this, please ask for an extra Pi-Stop to use in your project.
Hint: You will need to create new broadcast blocks using the 2nd set of pins. Also, think about giving drivers time to react before the other set of lights turns GREEN!
WORKSHEET: Tick the checkbox marked “Extended Task: Controlled two Pi-Stops at the same time!”
The next guide is:
Explore and Challenge Scratch GPIO: Pi-Stop Reaction Game
Where to get your Pi-Stop
The Pi-Stop was designed in partnership between 4Tronix.co.uk and PiHardware.com.

The Pi-Stop and accessories are available from the 4Tronix.co.uk shop.

The Pi-Stop workshop materials are licensed under a Creative Commons Attribution-NonCommercial-ShareAlike 4.0 International License
The Pi-Stop name and logo are Trademark of PiHardware.com and the design is Copyright 2014 of 4Tronix.com and PiHardware.com.
