
Guide To…Direct Network Connection
UPDATE – March 2017
Raspberry Pi Remote Connections – Without A Network!
No keyboard or screen available for your Raspberry Pi, but you have a laptop? There is now a very easy solution!
There are often times when a HDMI monitor is not available to use with your Raspberry Pi. To overcome this I’ve often set-up my phone to be a portable Wi-Fi hotspot, but you do have to ensure the details are set-up ready on my Raspberry Pi beforehand.
So what happens if it is a new or someone else’s Raspberry Pi?
In those circumstances it can be very useful to remote connect using a nearby network and a laptop (see the Guide to…Remote Connections). You have two options here:
- If you have a wired connection available you can simply plug into it and look up the IP address on the router.
- If you have a wireless connection available, you can now place a file on the SD-Card with the required settings which should be transferred on start-up to the system (I’ll create a guide to this at some stage).
However, sometimes when you are travelling, at an event or perhaps in a school classroom there isn’t a network available either!
So how can we make use of a laptop screen and keyboard when there is no network?
As discussed previously (in the Guide to…Remote Connections), there is the option of using a (console) TTL-serial cable, however this only provides rather slow access. The serial connection won’t support X11 (which as we have seen, allows us to run graphical programs too), and you won’t be able use VNC or shared folders if you have them set-up.
The answer is a simple network cable!

Connect and use your Raspberry Pi with just a Network Cable, a standard Imaged SD-Card and Power!
It is advisable to set this up before you need it so you can be sure that it is configured and working correctly. Once you do you can use the methods described in the Guide to…Remote Connections to access your Raspberry Pi as if it was on a standard network (if you already have a network available you can just connect to that instead).
Remember if you need the wired network for your computer (i.e. to get to the internet) then you shall have to make a choice about which one you wish to use (or get an extra network port by adding a USB network dongle). If you use wireless connections, then you can still have both!
What you will need:
- Raspberry Pi (Model B, B+, 2B or 3B)
- Micro USB Cable & Power Supply
- Micro SD-Card (loaded with NOOBS see below)
- A network cable
Any standard network cable should be suitable (needs to have a male RJ45 connector on each end), most cables available will be fine for our needs.
Note: You can use a normal network cable since the Raspberry Pi LAN chip is smart enough to reconfigure itself for direct network connections (in the past older computers would have needed a special “cross-over” cable).
Don’t worry if you don’t have NOOBS setup already, it is possible to do everything you need without a screen or keyboard attached to the Pi… Just configure the SD-Card and add power (see the section below for automated installs). If you are already set-up with a recent NOOBS/Raspbian install then it couldn’t be simpler.
Connect and go!
Previously this process was rather difficult without a screen and keyboard attached to the Raspberry Pi. This was because, by default, the system would not set-up an IP address when a cable was connected. This meant you had to configure the Raspberry Pi manually to have a fixed IP address appropriate for the temporary network.
Thankfully, things have finally moved forward and the latest installs of Raspbian include software which detects a new network connection and automatically assigns a suitable IP address. This is a HUGE help!
The final piece of the puzzle, is now we have a valid network link we still need to know what IP address the Raspberry Pi had given itself so we can tell our software to connect to it.
Fortunately Apple have this covered with their aptly named “Bonjour” service which checks the addresses on the network and ensures their hostnames are valid. A hostname is simply like a nickname given to a computer so you don’t need to remember it’s full address, just call the nickname instead.
If you don’t want/can’t install Bonjour then you will have to find the IP address either directly on the Pi using “hostname -I” or using a network scanner such as Fingbox (https://www.fingbox.com/download).
This means you can now use the Raspberry Pi by just referring to it’s hostname, by default this is set to raspberrypi.local or raspberrypi.
Hello Bonjour
If you have a OSX Mac you will have Bonjour running already. On Windows you can either install iTunes (if you haven’t got it) which also includes the service, or you can install it separately (via the Apple Bonjour Installer).
We now have a simple network just for two, allowing SSH, X-forwarding, file shares etc etc. We can now do all the lovely networky things we like to do, as detailed in the Guide to…Remote Connections page.

Scratch running nicely inside a window using X-11!
There’s even more good news for the Pi-Zero
This method has been used in the Pi-Zero network device video for excellent results. It is particularly special since we use the Pi-Kitchen to pre-configure the USB to act as if it is a network device – allowing us to make a simple network link using just a standard micro-USB cable (which will also power it!).

Raspberry Pi Zero with Micro SDCard and Micro USB Cable.
Installing NOOBS to your SDCard
Update: In order to put security first, the default operating system install (such as the one provided by NOOBS) no longer has SSH enabled.
https://www.raspberrypi.org/blog/a-security-update-for-raspbian-pixel/
If you want to later use SSH you will need to add a file called “ssh” to the boot partition on the Raspberry Pi. This can be done with the following command:
sudo touch /boot/ssh
This means that although you can perform an automated install without using a screen, you won’t be able to connect to it! Unfortunately, in the name of improved security, this method for running a Raspberry Pi headless has been broken (although I shall see if this can be fixed in newer versions of NOOBS). There IS a work around if you are brave (thanks to Procount). Another option is to add vncinstall to the end of the recovery.cmdline file.
Note: If you already have an up to date install you can skip this!
Load SD Card with NOOBS:
- Download NOOBS.zip from the RaspberryPi.org website.
- Format the SD-Card using the SD-Card formatter (SDFormatter)
- Extract NOOBS.ZIP to the SD-Card
Note: Your SD-Card should look something like this (with all the files in the root of the SD-Card and not in a directory).
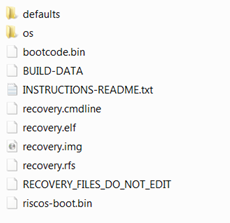
NOOBS files on the SD-Card
Automated Headless Install:
Option A: Using NOOBS
Although not a commonly known feature, NOOBS is able to automatically install a selected operating system without the need for a keyboard or screen.
To perform an automated install of Raspbian, you will need to edit the recovery.cmdline file on the SD-Card.
Note: If you are editing this file in Windows it is recommended that you use an editor which supports Linux format files (such as the freeware Notepad++).
Change the recovery.cmdline file:
runinstaller quiet ramdisk_size=32768 root=/dev/ram0 init=/init vt.cur_default=1 elevator=deadline
By adding silentinstall to the file (keeping everything else the same):
silentinstall runinstaller quiet ramdisk_size=32768 root=/dev/ram0 init=/init vt.cur_default=1 elevator=deadline
Option B: Pi-Kitchen
Set up Pi-Kitchen & select Auto Install (see the Pi-Kitchen pages for more details).
Note: The Pi-Kitchen allows complete customisation of the install and allows you to define multiple “flavours” set-up in whatever way you like.
Power Up & Install:
- Insert the SD-Card into the Raspberry Pi
- Connect the network cable between the computer and the Raspberry Pi.
Note: The network port on the Raspberry Pi will sense the connection type and automatically provide a cross-over for direct networking. Therefore we can use any standard RJ45 cable.
Add power and wait…and wait…and wait some more. You should see the activity LEDs flash while the OS installs. Depending on your SD-Card this can take up to 40-60 minutes. If this is your first go it is helpful to connect a screen so you can observe the installation progress.
Check your network settings…
While the OS is installing you can check your computer’s network settings are set to automatic. And if required we can enable Internet Connection Sharing (ICS) so we can use the host computer’s internet (assuming it usually connects to the internet via Wi-Fi).
Note: Most network set-ups will be set to automatic but if not ensure you write down the automatic, but if not ensure you write down the original settings so you can restore them later.
Set each of the settings to automatic which will allow the network to configure it.

Network Settings
Enable Internet Connection Sharing (ICS):
Select the ICS tab and select share this connection, and if needed select the network adaptor which your Raspberry Pi is connected to.

Internet Connection Sharing
That’s it, when the Raspberry Pi starts it should detect the settings and configure the internet gateway to match the IP address of the host computer.
Ready to connect?
When the Raspberry Pi has finished installing you should notice that the network adaptor will report “limited connection”.
NOTE THE FOLLOWING:
- You will need to wait for your computer to finish detecting the network settings (you may see a small networking icon flashing in your system tray while it does, or open up the network settings to see when it has finished and has an IP address) – it can take around 1/2 minute. Your computer may report the connection as “limited or no connection” when connected to the Raspberry Pi in this way, this is normal as indicates it is a direct computer to computer connection rather than a standard network (where it would expect to find an internet connection).
- If you are using multiple wired network adaptors (i.e. Using an extra USB-LAN dongle) on your computer you may find you have to unplug the other network cable and reattach afterwards (my Windows XP machine needed this before it would connect through the direct link).
Summary
Now you should be able to do most of the things you would normally do when connected to a network.
One VERY useful thing to do is to set up “Putty” and “Xming” to allow you to control the terminal and graphical programs directly from your laptop/computer.

Scratch running nicely inside a window using X-11!
See the main Guide to…Remote Connections for links for how to set-up VNC and shared folders, and X-11 on other computers.
Install Putty and Xming Server (for SSH and X11)
I am assuming you are using the latest version of Raspbian which has SSH and X11 Forwarding enabled by default (if not see the bottom of this post to enable them if things don’t work).
1. Install and run a X-Windows server on your computer
Download and run http://sourceforge.net/projects/xming/ from the Xming site.
Follow the installation, including installing “Putty” if you don’t have it already. You can also download “Putty” separately from http://www.putty.org/
An alternative X-Windows server is available called mobaxterm, this provides a little more control, keeps your X-Windows together and handles your sessions etc. You can get it from http://mobaxterm.mobatek.net/. (Thanks to Mike for this tip).
2. Ensure your SSH program (Putty) has X-11 enabled.
In the PuTTY configuration, find “Connection”, “SSH”, “X11” and tick the check-box for “X11 forwarding”. If you leave the X display location blank, it will assume the default “Server 0:0” (you can confirm the server number by hovering your mouse over the Xming icon in the system tray when it is running). You can save your set-up within Putty so you will won’t have to do this each time.

Putty Configuration for X11 Forwarding
3. Enter the Raspberry Pi’s IP Address

Putty Configuration for given IP
Enter the IP Address of the Raspberry Pi in the Session settings above (you may also find that you can use the Raspberry Pi’s hostname here instead (default: raspberrypi)).
Save the setting using a suitable name (RaspberryPiDirect) and press “open” to connect to your Raspberry Pi. You will likely get a warning pop-up stating you haven’t connected to the computer before (allows you to check you have everything right before continuing).
All being well, you should be greeted with a prompt for your username and password (remember the defaults are pi and raspberry).
4. Using X11 and Xming
Ensure you have Xming running, by starting the Xming program from your computers start menu and then in the terminal window, type a program which normally runs within the Raspberry Pi desktop (such as “leafpad” or “scratch”). Wait a little while and the program should appear on your computers desktop (if you get an error you have probably forgotten to start “Xming”, so run it and try again).
- If you want to run an X program, but still be able to use the same terminal console for other stuff, you can run the command in the background with &:
i.e. leafpad &
Just remember that the more programs you run, the slower everything will get. You can switch to the background program by typing “fg”, check for background jobs with “bg”.
- You can even run a full desktop session through X-11, although it isn’t particularly user-friendly and VNC will produce better results. To do this you have to use “lxsession” instead of “startx”.
- If you get the following error (or similar) when running PyGame or Tkinter scripts:
_tkinter.TclError: couldn't connect to display "localhost:10.0"
Use the fix below:
cd ~
sudo cp .Xauthority ~root/
More details and links are in the main Guide to…Remote Connections.
Additional Information / Troubleshooting
- To switch on (or off) SSH you can access raspi config (just type “sudo raspi-config” from the terminal) and select SSH in the menu (it seems like SSH is already enabled by default for some distros).

- Enable/Disable SSH via Raspi-config

- Ensure X-11 forwarding is enabled on the Raspberry Pi (again, a lot of distros now have this enabled by default).
Use nano with the following command:
sudo nano /etc/ssh/sshd_config
Look for a line in the /etc/ssh/sshd_config file which controls X11Forwarding and ensure it says (with no # before it):
X11Forwarding yes
Save if required (ctrl+x,Y, enter), and reboot:
sudo reboot
What is an IP Address / Hostnames / Pinging / Subnets?
An IP Address is like your phone number or post code, it simply allows other computers to find that particular computer in the network and ensure any messages it sends goes to that one in particular.
Often, IP Address’s can be replaced with hostname’s so that we can ask for a specific computer without knowing all the numbers (like the contacts list on your phone, the computer looks up the name and uses the number for you). For instance, http://www.google.com, is a hostname, where it’s IP address is 173.194.45.49 (probably depending on where you are). We can “ping” the address using the following command, which simply sends some short messages to see if there is another computer on the other side to respond to them.
ping www.google.com
or:
ping 173.194.45.49
Subnets:
Networks use subnets to help handle the fact that there could be a HUGE number of computers on a network (like the internet) and it would be impossible for a computer to listen to and respond to any computer in the address range 0.0.0.0 to 255.255.255.255.
To handle this, networks will use a subnet mask, this ensures that a computer only needs to respond to computers with are within the same SUBSET, which is defined by the SUBNET MASK setting.
The mask is a series of flags which defines which range of addresses the computer will respond to (by filtering out any which are not within the allowed range):
255.255.255.0
Means it will respond to computers which have IP addressing matching at least the 3 first numbers. So a computer with an address of 192.168.1.90 and subnet mask of 255.255.255.0 will only talk to other computers with addresses in the range 192.168.1.0-192.168.1.255 (except 90 of course!). Large networks often use SUBNETs to split up larger networks into sections so that they run more efficiently.
Note: You will not be able to set the SUBNET MASK to wider than 255.0.0.0. The Raspberry Pi defaults to a subnet mask of 255.255.0.0, which is perfect for most situations.
Trouble-shooting:
Steps to check:
1. Check the IP address which get set on both machines (both should be in range 169.254.x.x).
On RPI use one of the following commands:
hostname -I
ifconfig
On PC use the following (or look it up from the Network & Sharing Center and look at the adaptor properties):
ipconfig
- If this fails, check the cmdline.txt file is right/cable connected etc. You can use the following to force the IP address on the RPI (for testing the rest – but this won’t be set next time you reboot):
sudo ifconfig eth0 169.254.0.2
- Check you can ping each of the addresses from the other computer (where 169.254.0.xxx should match the computer you want to talk to). Test both directions.
ping 169.254.0.xxx
- If this fails, check PC’s firewall and disable wifi (sometimes the ping command will try using the PC’s wifi instead)
- Check you can connect via SSH (using putty)
- This should work if you can already ping the other machine (it is unlikely to work if you can’t ping it).
References:
Thanks to fellow MagPi – Colin Deady for testing out on Mac for me.
Thanks to the following sites for providing various parts of the puzzle (in no specific order):
www.kernel.org – kernel documention
http://learn.adafruit.com/adafruits-raspberry-pi-lesson-6-using-ssh
http://people.arsc.edu/~murakami/xming/
http://jeremy-nicola.info/portfolio-item/ssh-x-forwarding-on-windows/
http://en.wikipedia.org/wiki/Subnetwork
http://en.wikipedia.org/wiki/Link-local_address
http://www.raspberrypi.org/phpBB3/viewtopic.php?f=29&t=22716
http://www.raspberrypi.org/phpBB3/viewtopic.php?f=27&t=24993
http://www.raspberrypi.org/phpBB3/viewtopic.php?f=32&t=26934

[…] Guide To…Direct Network Connection […]
Hi meltwater. I am trying to do this with an ubuntu laptop and a pi and it doesnt work they cant see each other. Amy help would be appreciated.
Thanks
Hi Matt.
It is easiest to set this up while you have a screen and keyboard available.
First step is to ensure both are using similar IP addresses (so if Ubuntu networking is set to automatic, connect it to the running RPi and see what IP gets allocated – it can take a while to get one sometimes) – it should be 169.254.x.x (x= something). You can edit the cmdline.txt file to add a similar address (169.254.1.1 for example) for the pi to use. Now ensure you start up the RPi again with it connected to the laptop, and confirm the laptop gets an IP address again. You should be able to “ping” each of the addresses from each computer. You may find you need to disable the wifi on the laptop until you have made a connection (some adaptors will override others if they consider the connection better).
Hope that helps.
Hi, I using UBUNTU, the connection work but I cannot load the graphic program from my UBUNTU. I get error:
pi@raspberrypi ~ $ scratch
Executing: /usr/lib/squeak/4.4.7-2357/squeakvm -encoding UTF-8 -vm-display-x11 -xshm -plugins /usr/lib/scratch/plugins/:/usr/lib/squeak/4.4.7-2357/ -vm-sound-alsa /usr/share/scratch/Scratch.image
Could not open display `(null)’.
I’ve not used X-11 forwarding with Ubuntu, but it could be that X-11 Server isn’t running or the server address is different. Suggest checking through the instructions on the Xing site.
When using xming and putty on windows i can run the graphic program such as scratch and lelfpad and etc. In UBUNTU I used only putty because the xming not available for Linux(UBUNTU) it only for windows.
With putty In UBUNTU I only can run the CLI for interact with PI, I can run program like nano for text editor and run python…
what the optional setup or program that the same function like xming for UBUNTU for allow me to tun the graphic program.
From what I can tell, you just need to add -X to the ssh commandline on Ubuntu when you connect to the Raspberry Pi and it will enable X-11. You also need to have xauth installed on Ubuntu (it probably already is). Let me know if that works.
[…] Meltwater has done an extensive guide on communication with your Raspberry Pi via a network cable between the Pi and your laptop (or other machine). It’s quite long-winded, and for anything graphical it’s even longer with a lot of hoops to jump through, but if you need something like this, this is the best tutorial I’ve seen yet. Read the guide […]
I promise it isn’t half as scary as it looks (a lot is to just cover the “difficult” set-ups).
This is brilliant Meltwater. I know how long it takes to produce quality content like this. Thanks for putting in the hours. 🙂
Thank you! And I know very well the quality content you have on your site.
This is needed for a forth-coming workshop (where monitors might not be available) so needed a solid & easy solution. Hopefully it will be! 😀
I like those USB RS232 thingies that go on the UART GPIOs 14/15, but they’re no good if you want a GUI. Fine for command line though.
Yep, used mine a few times (handy for powering too in a jam *pun-totally-by-accident*), but also wanted file sharing etc too.
Should do a tutorial using them for data logging (either logging on the pi or pc) might be useful.
[…] you can imagine, I was very happy to read that Meltwater has written a detailed guide to solving this very problem. It took me a while to get it all going, though. I already had all the PC software in place as I […]
Hey Meltwater
Thanks for the awesome walkthrough. SSH working fine after following the steps, however my laptops Wireless connection doesn’t seem to be shared with the RPi. I enabled ICS on windows but still no connection. I am running apache2 on the RPi could this have something to do with it? have you got any suggestions on what to try.
Thanks
Also I am using Automatic IP allocation on my windows machine
I’ve not had time to try to sharing internet through the link yet, but should be possible (when I get time after next week I can look at it properly). You may just need to add your gateway information into the RPi cmdline.txt. Let me know if you get it working and I’ll test and add it!
So I got my internet sharing to work.
enable ICS in properties of your wireless connection
Edit the cmdline.txt on the sd card
in this format:
ip=:::
This was my values:
ip=169.254.0.1::169.254.59.25:255.255.0.0
Raspberry pi was the set static ip
Server ip left blank
Gateway is the LAN is the ip of the laptop
Gateway and netmask values were found by using command line on the laptop.
using “ipconfig”
Save the cmdline.txt and boot up the pi
use “sudo nano /etc/network/interfaces”
Add the same details as the txt file.
address 169.254.0.1
gateway 169.254.59.25
subnetmask 255.255.0.0
save and exit
Sudo poweroff
then delete the line added to cmdline.txt
reboot
login
ping google.com
I managed to get it working in a similar way (thank you for trying it and sharing the info), it might be enough to just use the cmdline.txt file (I will see how it works in the next few days).
The difficult part is when ICS is enabled it will give the laptop LAN a different IP address (to work with the wifi address range). So the 169.254.x.x direct line number has to change to match the network.
So you can set the Cmdline.txt with ip=RPI-PI::LAN-IP
– where LAN-PI is the laptops IP address when ICS is enabled, and RPI-PI is the same as except the last value.
It takes a bit of switching between ICS enabled (to get IP) and then disabled to make the change on the RPi via nano, and then re-enable to use it.
Will see what happens if it picks up a different IP address or something for the Laptop another time (or on a different network).
I need to test this on my PI but, I believe it is worthy to note that the laptop’s/desktop network card has to have support for port auto sensing or it we will have to use a cross-over cable: http://en.wikipedia.org/wiki/Ethernet_crossover_cable
The raspberry pi does this so other computer does not need to.
[…] Raspberry Pi Remote Connections – Without A Network! No keyboard or screen available for your Raspberry Pi, but you have a laptop? There are often times when a HDMI monitor is not available to use … […]
This is awesome! Now I can use XRDP to remote desktop into it with only two cables (Ethernet + Power)!!
and when the Model C comes out, with power over Ethernet, you may well be able to do everything with just one cable.
I did start looking at making my own power over ethernet, just to see. You are unlikely to get the PC to supply power over it though, so would need your own custom cable (any easier than a standard usb cable and network cable?).
Although, making the Model C work as a USB device would be helpful! (potentially possible with Model A…).
[…] je izdelal izčrpen vodič za namestitev za začetnike, poleg njega pa še krajši vodič za napredne uporabnike, ki ne potrebujejo toliko […]
[…] has made an exhaustive guide to setup for beginners available, alongside a cut-down version for advanced users who don’t need quite so much […]
What am I supposed to see (or what should I set, or use) on the laptop?
I’ve noted the IP address (which is actually ‘obtain IP address automatically’) and there is no Subnet Mask. I’ve made the changes to the cmdline.txt on my SD card (using my PC). When I connect it all up and apply power to the Pi (a Model B), after a few seconds I see all the LEDs on the Pi and I see the message about ‘limited or no connectivity’ on my laptop task-bar … and then what?
Is something supposed to appear on my laptop screen? … nothing is happening so far!
Am I supposed to run something else on my laptop?, or is the screen supposed to go blank and then boot as if it’s a Pi? I’m seeing nothing.
Graham. The next step is step 3, where you use a program called Putty to allow you to connect to the Raspberry Pi. This provides “terminal” access (you can use the Raspberry Pi command line). If you also go on and install Xing Server, you will also be able to run graphical programs too.
[…] Handy! RasPi Guide To…Direct Network Connection: […]
[…] has made an exhaustive guide to setup for beginners available, alongside a cut-down version for advanced users who don’t need quite so much […]
sir could you please provide any video tutorial……
That is a most EXCELLENT idea! I shall create one when I get time to do so.
[…] Raspberry Pi Remote Connections – Without A Network! No keyboard or screen available for your Raspberry Pi, but you have a laptop? There are often times when a HDMI monitor is not available to use … […]
Thank you for this helpful tutorial! I ran into a snag and chalk it up to being new at this. I successfully brought up the Rapsbian GUI on my laptop screen once using the lxsession command, but when I try to do so now (after multiple reboots), I get the message “Only one lxsession can be executed at a time”. I have been searching online for lists of commands, others that have had this problem but haven’t found a working solution. Is there a way to logout of whatever session it thinks I’m logged into? I’m confused, because I figured it would have closed lxsession automatically when the Pi shut down. I’m hoping to recommend this method to my elementary age students so they can have easy access to a screen, but am afraid they’ll get stuck on this same problem that I have. Any suggestions?
I have used the lxsession a few times, although I can’t recall that particular problem (the session part does seem to be odd though). I shall do some more tests with that and let you know (even when running via VNC it isn’t that clear if XWindows is shutdown afterwards).
You may find it easier to run each of the programs directly (so it is just those programs which run), would probably be more responsive (less load on the Pi and less network traffic). You could even add a menu on logging into the PI via SSH, which allows easy selection of the required program.
I think this is a fabulous idea, but since I am really lazy I tried a different approach. I installed a freeware DHCP server on my laptop and bound it to my onboard NIC. After configuring the DHCP server with some simple settings (it’s all in the config file that comes with the server), you just connect everything up and turn on the pi. As long as you are using DHCP on your PI, you can leave the files on the card alone.
That was something I was going to try if I couldn’t get it working. For the workshops though, I wanted to avoid anything which would break people’s home/work network settings.
I think it is possible that the Raspberry Pi should be able to detect and allocate the IP in this case – like most other computers do (it just appears not to be implemented yet in the distro). That would make the process super simple.
[…] https://pihw.wordpress.com/guides/direct-network-connection/ […]
This doesnt work!
It does. 🙂
What part are you having issue with? I would suggest trying it using a monitor and test the network links by using the “ping ” command where is the address of the other computer (the command is the same in windows as it is in linux). If you still have problems and want to get it working, email me directly and I can take you through it step by step.
The other thing to watch out for, is computers with multiple network adaptors (including wireless ones) can get confused about which link to use (so try disabling them until you have a link working), also the RPi should have the network cable connected when it powers up.
I see that this is for a cable connection to the RaspPi.
Is there a WiFi method and how does one set up a static IP address in /etc/network/interfaces?
Thanks
I’ve not looked into this, as it wasn’t needed for the workshop I was running. You may find some guides which make the Raspberry Pi into an Access Point useful, as this would probably provide a way to connect directly over WIFI.
[…] pihw via Raspberry […]
Would you plz give the instruction about how to connect it to the internet using the link?
Thx
Testing out solutions this week. See the comments and replies above with Lewis103, for possible solutions.
– Currently running it OK with internet (just with the cmdline.txt mod with ip=RPI-PI::LAN-IP) – where LAN-PI is the laptops IP address when ICS is enabled on the wifi to the LAN, and RPI-PI is the same as LAN-PI except the last value.
Hi,
Nice guide, I have followed everything you wrote, but when I try to ping the laptop from the RPi I do not get any response, while the other way around works, I can use Putty to get access to RPi. I have also tried to connect to the internet as I saw on the comments, but I am not able to.
Could you please tell me what I did wrong?
Thnx!
The internet bit is a work in progress, one solution that fits all may not be possible.
Sounds like the link is working fine, the one-way nature of it suggests to me that you have some firewall settings on the laptop (but that is just a guess) which has closed needed ports in one direction.
[…] The article can be found here. […]
Great guide thanks for the time and effort put in…
Only issue I’m having is that I have to manually set the IP address on rasp. I have tried both methods (sd card reader on PC and nano on rasp) but each time I reboot rasp and check hostname it’s blank.
Everything else included vnc is working perfectly! Thanks again
Resolved! Everything working perfectly…. Great instructions thanks
It does not work:
I have the Network cable connected and the laptop (Windows 7) on before powering my Raspberry PI on. The LAN adapter (Realtek PCIe GBE Family Controller) is set to ‘Obtain an IP address automatically’. I have disabled the Wireless Network adapter.
On the Raspberry PI I have executed:
– sudo ifconfig eth0 169.254.0.2
– hostname -I Network Connection Details, the IP generated is ‘169.254.64.136’. I tried to do ‘ping 169.254.64.136’ on my Raspberry PI and got no response.
Am I missing something? I rebooted the Raspberry PI and assign the 169.254.0.2 again and nothing. I rebooted the laptop and nothing. I changed the Ethernet cable to a crossover cable and nothing.
Hope you can help me out.
1. Ensure that any other network adaptors (i.e. wifi) are disabled (at least while you are making the first connection) – some adaptors will over-ride others.
2. Ensure your on your laptop firewall isn’t blocking anything, if you have one.
Unfortunately, every set-up can be slightly different, some are easier than others. The above are the most likely things I can think of.
Thanks for this – it’s come in very handy 🙂
[…] the source and tutorial, click the link below: Raspberry Pi Remote Connections – Without A Network! […]
[…] Raspberry Pi Remote Connections – Without A Network! No keyboard or screen available for your Raspberry Pi, but you have a laptop? There are often times when a HDMI monitor is not available to use … […]
[…] https://pihw.wordpress.com/guides/direct-network-connection/ […]
I think it’s worth pointing the following out(because I get the feeling some people think the Pi will take over the laptops keyboard, mousepad and screen):
To connect to your Pi from another computer one would normally connect the Pi to the same Internet router(or switch) that your laptop/desktop is connected to – and then ssh or putty or vnc or remote desktop to the Pi from your laptop or desktop.
This is the very same thing – but without the Internet router(or switch). Normally DHCP sorts this out for you – but this assumes there’s no Internet router/switch or DHCP involved.
That means this is an exercise in making sure that you can find and set the appropriate IP addresses on your laptop/desktop and also on the Pi so that when you connect them directly with a network cable they are on the same network and can see each other/talk to each other.
It’s a great idea and well explained – unless you don’t get what it is actually trying to achieve – hence me posting this 🙂
Fair point, will make it a bit clearer in the beginning part.
Hi
If I try to connect with putty it says that the connection timed out. Also if I look at the status of my lan connection it says “unidentified network” and there are 200 bytes sent but 0 received.
I’m using the Raspbian “wheezy” from 2013-02-09
I would be very happy about answers
You may have a firewall blocking the ports used by putty and SSH (port 22). Go through the steps in the option 2, if you can’t “ping” the computers then the link isn’t working (also disable any other network device on the computer such as wifi in case that is the issue).
I got the “connection timed out” message. It turned out that the problem was in cmdline.txt. I used Window’s Notepad editor to edit it, and added the IP address at the end of the file. However, when I looked at the file later, there was some kind of unprintable character before the IP address. Perhaps Notepad was confused by the CR LF differences between Windows and Unix? In any case, it worked fine after I cut the unprintable character and pasted it after the IP address.
I’m unable to read the files on the SD card on which I installed wheezy. I installed wheezy using ubuntu and now it does not even detect the card. In windows it says to format the disk. Please help.
Does the card work with the Raspberry Pi still? If so the issue maybe your SD Card reader (or some built in SD Card slots have issues). Otherwise retry with different computer & card reader.
The issue was with the partition on the SD card. Once I deleted the partitions and re-installed the rasbian and then it worked. Thank you for the tutorial.
If you keep getting errors on the card, perhaps change your PSU (put USB items on a powered hub) as it might be having power issues.
Glad it worked.
Thank you. It worked (Raspberry IP + PUTTY + Xmin).
I am going to put Ruspberry on robotic platform. This makes development much easier.
[…] The way that was done – and is still done – is that I take comprehensive notes while I’m doing something and then do a complete run-through of the instructions again on a fresh install when I’m finished. It takes a long time and a lot of effort, but it’s worth it when people take the time to leave a comment that it helped them. As I said to Meltwater on his blog recently “I know how long it takes to produce quality content like this“. […]
Would it be possible to do it the other way around with the screen sharing? From my computer to the Raspberry Pi?
I was thinking about that last night in fact.
Yes, I don’t see why it wouldn’t, just need VNC installed on the machines. Obviously X11 won’t work for MS windows.
Would just have to see if the processor can cope with displaying it, but I expect it would manage.
I can’t recall now if I tried using LogMeIn on the Raspberry Pi, it may have worked with the Chrome browser on the Pi (to view windows machine).
Thanks! do you have any link to these programs? I am new to Pi, so I have not much experience with this sort of stuff and what raspberry pi can run etc.
In case you are curious, I am trying to use it as a video converter (the shame) for my computer as I have an old composite DvD recorder I wish to use. Would this be possible? I imagine it would be, but I need some advice before I go gun-ho into it.
Thanks.
Not off hand no, since I’ve not tried it. Are you planning on getting the PI to perform the video encoding? If so it will only be viable if the hardware encoding works, something I’ve not been able to confirm so far.
Is it possible to video this procedure? I’m a bit confused on how to do it still.
Cheers,
Raj-Dawg
Yes sorry. I was hoping to when I got some spare time, not had chance yet.
Awesome Cheers!! 😀
Hi, It not work I get an error:
pi@raspberrypi ~ $ scratch -X
Executing: /usr/lib/squeak/4.4.7-2357/squeakvm -encoding UTF-8 -vm-display-x11 -xshm -plugins /usr/lib/scratch/plugins/:/usr/lib/squeak/4.4.7-2357/ -vm-sound-alsa /usr/share/scratch/Scratch.image /home/pi/-X
XShmAttach: BadAccess (attempt to access private resource denied)
X Error: BadShmSeg (invalid shared segment parameter)
Major opcode of failed request: 130
Minor opcode of failed request: 3
Serial number of failed request: 85
X Error: BadShmSeg (invalid shared segment parameter)
Major opcode of failed request: 130
Minor opcode of failed request: 3
Serial number of failed request: 86
X Error: BadShmSeg (invalid shared segment parameter)
Major opcode of failed request: 130
Minor opcode of failed request: 3
Serial number of failed request: 87
Sorry, I mean when you run ssh. ssh pi@192.168.1.10 -X (where 192.168.1.10 is the Rpi ip address).
Hi I get an error list below
shahrol@shahrol-K53SD:~$ ssh pi@192.168.0.32 -X
pi@192.168.0.32‘s password:
Linux raspberrypi 3.6.11+ #371 PREEMPT Thu Feb 7 16:31:35 GMT 2013 armv6l
The programs included with the Debian GNU/Linux system are free software;
the exact distribution terms for each program are described in the
individual files in /usr/share/doc/*/copyright.
Debian GNU/Linux comes with ABSOLUTELY NO WARRANTY, to the extent
permitted by applicable law.
Last login: Tue May 14 12:24:06 2013 from 192.168.0.103
pi@raspberrypi ~ $ scratch
Executing: /usr/lib/squeak/4.4.7-2357/squeakvm -encoding UTF-8 -vm-display-x11 -xshm -plugins /usr/lib/scratch/plugins/:/usr/lib/squeak/4.4.7-2357/ -vm-sound-alsa /usr/share/scratch/Scratch.image
XShmAttach: BadAccess (attempt to access private resource denied)
X Error: BadShmSeg (invalid shared segment parameter)
Major opcode of failed request: 130
Minor opcode of failed request: 3
Serial number of failed request: 85
X Error: BadShmSeg (invalid shared segment parameter)
Major opcode of failed request: 130
Minor opcode of failed request: 3
Serial number of failed request: 86
X Error: BadShmSeg (invalid shared segment parameter)
Major opcode of failed request: 130
Minor opcode of failed request: 3
Serial number of failed request: 88
Ok, I’ve done a little searching…
http://www.raspberrypi.org/phpBB3/viewtopic.php?t=15062&p=154454
http://www.coderchimp.com/2013/04/use-my-mac-as-interface-to-pi.html
The upshot according to them is that the -xshm option is causing the problem and without it does work (but slowly). I missed this as I don’t have a mac (the testing was done for me), and the other machines I had to test with were all windows. I do find it a little odd though, that it works for windows but not linux or Mac, gives me a nagging feeling that it should. Thanks for highlighting it though, if no one mentions it I can’t find a solution.
Bug in scratch perhaps: https://bugs.launchpad.net/ubuntu/+source/scratch/+bug/1076036
Hi. I already test all. The result is: Problem only occur when using scratch. Before this I dont know the list program and package install in raspberry pi.
List all package using # dpkg –get-selections
so i try a few program including lxpanel and it work.
The best of lxpanel is it create the start panel like in raspberry pi on your UBUNTU desktop so you can choose the program you want run.
For meltwater2000 Thank for helping me.
I’ve not used that – seems to be similar to using “lxsession” which allows a desktop over X-11 and run scratch from there (lxpanel is probably better as just the start menu).
It appears there is a fix for scratch, but doesn’t look like it is available yet from apt-get (still failed in my VM).
You can also put the following into a scratchx11.sh file and run: /usr/lib/squeak/4.4.7-2357/squeakvm -encoding UTF-8 -vm-display-x11 -plugins /usr/lib/scratch/plugins/:/usr/lib/squeak/4.4.7-2357/ -vm-sound-alsa /usr/share/scratch/Scratch.image
Looking at it running on windows, I think it still doesn’t use -xshm (message saying it is missing) but it continues and works anyway.
I’ve updated the “Tips” section on the main remote connections page. Thanks for letting me know.
hey hey meltwater,
i m using win7 and im trying to connect my pi b with it, but ive got every time the same error message: Network error: Connection Time Out . im really wondering, cause i though i did everything fine? mabye you have an idea?
Thanks a lot!
Paul
Yep check the cmdline.txt file. You can also check the IP addresses which get allocated to the PI and your Win machine (see option 2 to check values). They should be similar (at least first two numbers the same).
Awesome, really awesome, i would never though that the editor would paste some freaky character between the two words! So now everything works fine!
And thanks alot!
2013/5/21 Meltwater’s Raspberry Pi Hardware
> ** > meltwater2000 commented: “Yep check the cmdline.txt file. You can also > check the IP addresses which get allocated to the PI and your Win machine > (see option 2 to check values). They should be similar (at least first two > numbers the same).” >
Hi meltwater,
I am not able to understand : when i have attached there is no LED blinking from th lan-wire and there is no networking item is flashing ,
When i have directly connected lan to raspberry pi then also there in no blinking of LED of lan.
Presentlly, I have not any screen ,
Suggest some way to debug it
When there is no lights flashing, I often find I have forgotten to insert the SD card back into the unit (particularly if I’ve been editing the files on another computer).
Unfortunately debugging is always difficult without a screen, the key is getting that network link working and knowing the IP address of the Raspberry Pi.
Hello there
I was getting a “Network Error: Connection Timeout” when I added “ip=169.254.0.2” to the cmdline.txt files
So I ran ipconfig and used the Autoconfiguration IPv4 address instead under Ethernet adapter Ethernet. There’s also an IPv4 address under Wireless LAN adapter Wi-Fi, but it’s a 192.168…. so I figured I am not to use that one.
But now Putty gives me “Network Error: Connection Refused”
Dan, the aim is to get the RPi’s IP address to be in the same address range as the network adaptor you connect to, so you it will be the address you get for the Wired LAN which is important here.
Sometimes if you have the Wifi enabled, then your computer will try using that connection first, so switch that off while you are trying to make the link (it should be fine once you’ve connected to switch it back on).
Is it possible to access internet from Raspberry in this configuration? Thanks.
Yes but you have to enable ICS first (share the wifi adapter with the lan adaptor) and then use the IP address that then gets allocated to your lan adaptor as the gateway setting on the RPI (and also set the RPI IP to a similar address).
1. Enable ICS on wifi and share with LAN adaptor.
2. Find out new IP address of LAN adaptor (i.e. 192.168.137.1).
3. Set ip= in cmdline.txt as follows:ip=192.168.137.10::192.168.137.1
4. If all goes well, you will also have internet from the computer’s WIFI.
The disadvantage of this method I think is that the LAN adaptor address may change on different networks (yet to confirm what happens).
I shall do a post to cover this at some stage but have been terribly busy last few weeks. Let me know if this works/doesn’t work.
I followed the instructions and was successfully able to use MobaXterm on Windows 7 to connect to my Pi. I can ping the Pi from Windows, and can ping Windows from Pi, but have not been able to access the internet from the Pi. My Windows internet connection is via a 3G modem plugged into a USB port. When I enable ICS on that modem, I can no longer connect to the Pi from Windows. I get a “Network is unreachable” message in MobaXterm. Any suggestions on how I can get this to work? Thank you for any help!
hello meltwater i have followed your procedure but at the end i am getting this error
Putty fatal error
Network error: Network is unreachable
Ensure that the Raspberry Pi is getting the IP set correctly (hostname -I) [uppercase i]- if not what you set, then recheck the cmdline.txt file. Then try “ping 169.254.x.x” whatever it is set to from your computer.
Hey meltwater,
If I do all of this will it allow me to have access to the Raspberry Pi desktop on my laptop? How can I do this?
Thanks
If you have a network to use, then you can follow:
Personally I find the X-11 connections most useful (as you can load programs separately as if they were local).
The direct connections are to allow the network to work between two computers without an external network. Then you can use the remote connections above with or without a network.
Hope that makes sense.
I have been trying to find a way to use my laptop as a monitor for my Raspberry Pi. My laptop has a SD card reader, HDMI port, Ethernet port, and multiple USB ports. It runs Window 7. Is there any way I can just use this laptop to view the Raspberry Pi desktop. I have a monitor in my living room that I can use but would rather just be able to hook my Raspberry Pi directly to my laptop. Hope this makes sense.
If you have network, then you don’t need to connect it directly, just connect the Raspberry Pi to the LAN and use one of the Remote Connections solutions.
If you don’t have network, then you can use a single network cable as a direct link, again you can then use all the Remote Connection options once you have that link setup.
To control the desktop, you can use VNC (note, it is a separate session rather than the desktop which would be present if you had a monitor connected).
However, I would recommend X-11 forwarding and X-Server though since you run programs individually rather than a full desktop (faster and easier to manage with other windows).
The limit is with remote connections is that you will not be able to view things which use the GPU, such as videos through the link (although, if you leave it connected to your TV, you can switch over to that for video, while accessing it remotely through the network).
Let me know if you need more info!
I frockin did it!!!!
Man, it took me a while to figure out how to create the direct connections and also share the internet via my laptop. But i got there…..after reading the comments over and over again.
You Sir/Mam…..is the man!
Direct network connection works great! Thanks for all your work. Is it possible to have a WiFi connection on the Rpi connected to the internet at the same time the direct connection to the laptop is running? I can’t seem to make it work but maybe it is not possible? If someone has done that direct me to the procedure (I am pretty new to the Linux world).
Richard
I’ve not tried that way around, but you may be able to use the connected computer’s network (see the latest post). I’m sure it is possible, but getting the right combination of settings is the tricky part.
Thank you for your helpful and clear article, Meltwater. Just a bit of feedback: I found that adding ip=xxx.xxx.xxx.xxx at the *end* of cmdline.txt didn’t work for some reason, but it was fine if I buried it somewhere *within* the line. Just an idea for anyone who’s struggling …
Thanks for the feedback.
That may be down to the editor you used, it doesn’t like it if there is any extra characters after it (using a linux friendly editor like notepad+ is recommended).
Feel free to try the scripts in the “https://pihw.wordpress.com/guides/direct-network-connection/super-easy-direct-network-connection/” section.
Doesn’t seem to work with the Archpi…my client is a laptop (manjaro). I tried the DHCP way and the Static IP. I do not get it, or I got it wrong
Double check to see if the IP address is set on the RPi, if not, then recheck file in nano (should be no odd chars) and nothing at the end of the line.
Hello,
i have followed everything in this tutorial and i have followed option one (don’t have a monitor) but finally when i press open the putty session i get this message:
Network error: connection refused
what could i be possibly missing?
my problem is i can’t assign an ip to the raspberry pi although i have followed ur steps in adding an ip so my cmdline.txt now looks like this:
dwc_otg.lpm_enable=0 console=ttyAMA0,115200 kgdboc=ttyAMA0,115200 console=tty1 root=/dev/mmcblk0p2 rootfstype=ext4 elevator=deadline rootwait ip=169.254.0.2
but when i run advanced ip scanner the software doesn’t seem to detect it.
See if you can ping it directly. Also try using one of the pre-configured files, incase your editor has put windows chars in it.
Perhaps try one of the pre-written files from the https://pihw.wordpress.com/guides/direct-network-connection/super-easy-direct-network-connection/ section.
See if you can use the ping command to connect to it (ensure you switch off wifi and try too – it may try to ping through that instead).