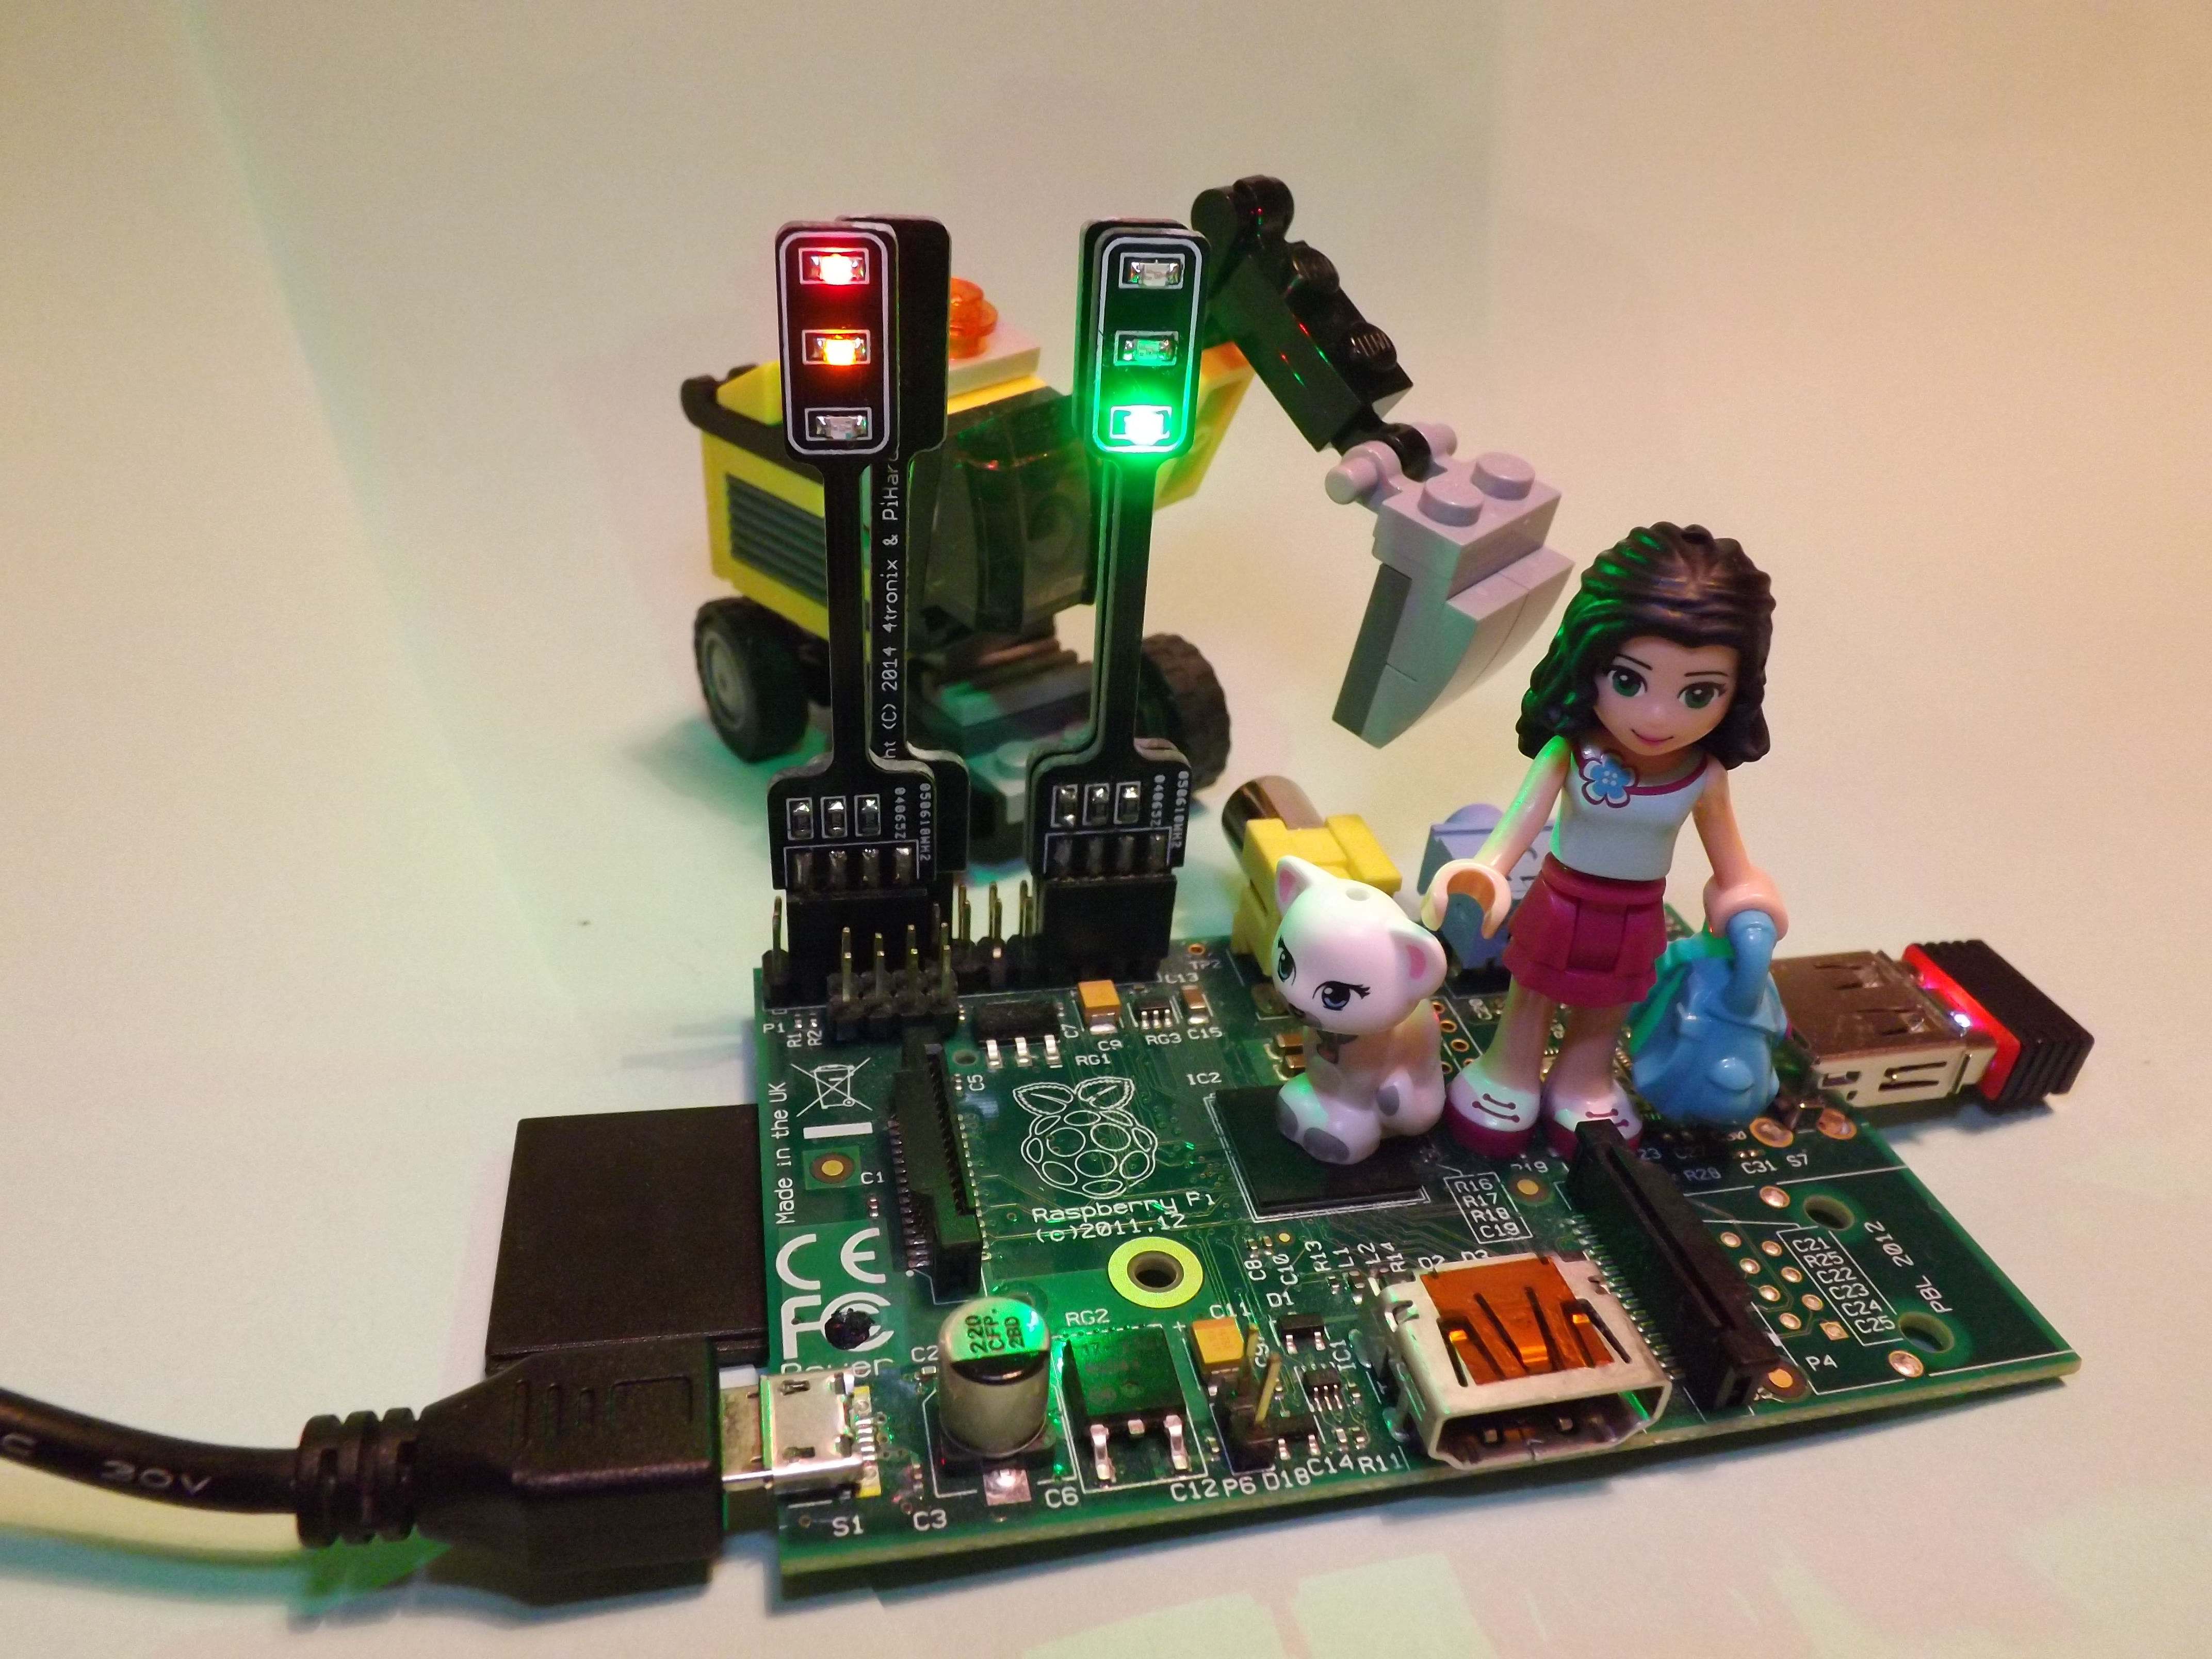
Fun time @Digi_Makers!

Posted: February 28, 2015 in General

Just a quick post (after a long but very fun day)…

Firstly many thanks for all those who attended the Pi-Stop workshop, a super-bright bunch you all were!  Hope you all had as good a time as I did, I shall return will some more challenges next time.

The workshop materials are available on git-hub, along with other guides and information.

For those who had a browse of my books most should be available on Amazon – or for the No-Starch-Press books from their website)

2015-02-28 21.53.42

Good news, my book (and others) is currently 25% off at Packt Publishing (using code PRINT25 at checkout, valid until 6th March 2015).

LogoDesignVertOp

I love hearing about how people are using the Pi-Stop to discover and learn, many thanks for sending me your stories of what you have got up to with them.

Remember you can now buy them directly from 4Tronix and also CPC Farnell.

I recently I was asked about using them with Python, well it was always my intention to produce a full Python workshop with the Pi-Stops, but I hadn’t quite got around to it.  Although there is the Python Pirate workshop, which I ran back on 29th Nov 2014, it used a rather specific python module for to make the Pi-Stop function as a lighthouse signal (lighthouse.py).

I decided it was about time I created a more general python module for the Pi-Stop.  So I have!

Check out the Pi-Stop Github for details and let me know how you get on with it (and feel free to add/request changes).  I shall add additional comments to the file and some additional tips on how to use it, but it should make a good starting point.

Get the module here: pistop.py

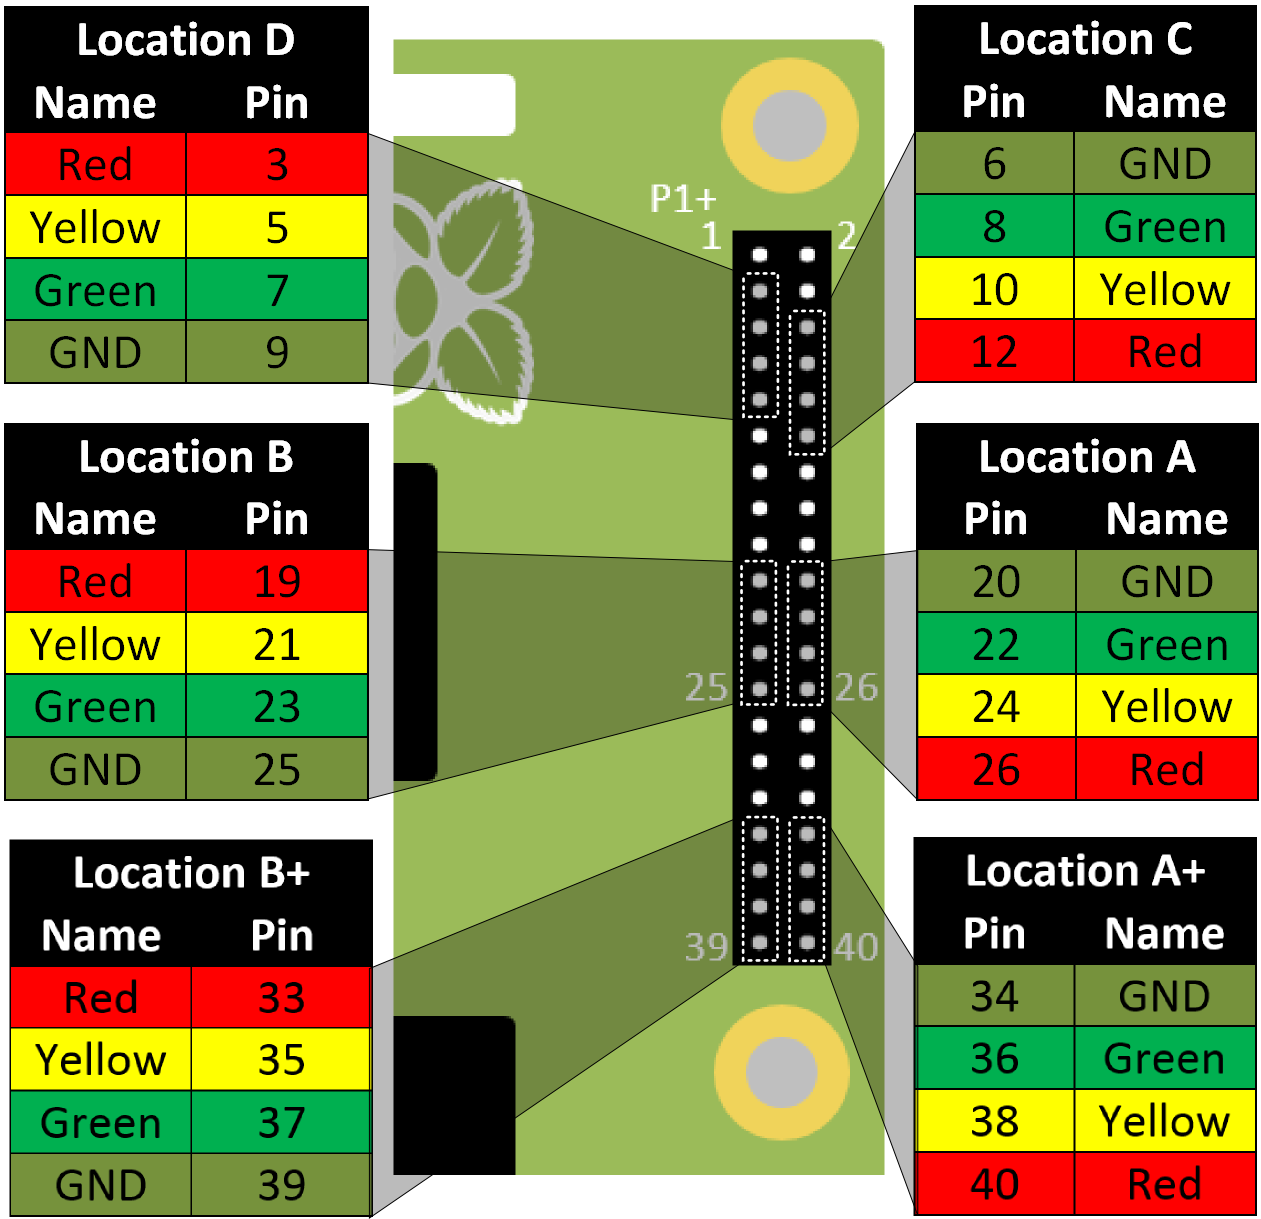
Note: It will work with the Raspberry Pi 2 (as well as Model+ versions – in all 6 locations).  But you will need the latest RPi.GPIO (version 0.5.11) for all the pins to work correctly.

Using the new Raspberry Pi 2 (or Model A+/B+) you can run up to 6 Pi-Stops independently, directly off the GPIO header.

When I get chance I’ll start writing some workshops which make use of it, as well as one which explains how it is constructed.

Enjoy!

I recently received a copy of No-Starch Press to take a look at, as a huge fan of “Python for Kids”, I was very keen to take a look!

2014-12-19 07.26.46

Javascript for Kids looks like another winner from No-Starch Press.

Check out my review of “Javascript for Kids”.

The Pi-Kitchen project

The Pi-Kitchen is evolving from the manual process of placing files in the correct places to become a little easier to use (while still retaining the full flexibility it offers). The first stage of creating an initial collection of recipes is completed (lots more to come!), and now there is a brand new component, the “Bake” scripts.

The scripts are a stepping-stone to the final GUI I have planned for the Pi-Kitchen (this allows me to better understand what will be needed in the GUI and to ensure the system is suitable).

There is still a small amount of manual setup to get started, but it is now fairly minimal with the majority of the “Baking process” automated.

20150206_144540

Check out the “baking” script on the Start Baking page, creating a full Raspberry Pi set-up right out of the box.


The new Raspberry Pi 2

What a surprise the release of the new powerful Raspberry Pi 2 was!  A quad-core ARMv7 cortex chip with the already awesome GPU and double the RAM thrown in to boot.

The new Pi2 is particularly interesting, for two reasons.

  1. For those of you who have looked at my book (Raspberry Pi Cookbook for Python Programmers) I dedicated  the whole of Chapter 5 to creating 3D worlds using the excellent Pi3D libary.
B9OmV5FIMAAvgOf

Chapter 5 of the Raspberry Pi Cookbook for Python Programmers is all about the hidden gem of the GPU.


While the 3D aspect of the examples showed the true power of the Video Core GPU, it did show that the original Raspberry Pi struggled with the calculations to feed the GPU with the data it needs to build complex 3D environments on the fly.  Once the 3D environments were built, the Raspberry Pi transformed into a high-speed smooth machine, allowing you to waltz around beautiful 3D environments without a stutter or blip.

I can’t wait to see how a much faster quad-core Raspberry Pi will do justice to the GPU…roll on the fun!

  1. A key element for the future of hardware and therefore programming and software design is managing multiple cores and multiple threads far more effectively and efficiently.  The new Raspberry Pi will provide an excellent opportunity for people to experience this, at a grass-root level and I feel this will be pivotal for the next generation of engineers.  This aspect of the new Raspberry Pi will be excellent to explore.

Oh, and it looks like the Pi-Kitchen also works with the new NOOBS 1.3.12 version which supports the Raspberry Pi 2 (although no doubt there will be the odd tweak here and there).

So you were lucky enough to receive a Raspberry Pi for Christmas or perhaps you’ve had one a while and wasn’t too sure what to do with it then read on for some tips on how you can do more with this wonderful little computer.

1. Add a Wifi Adaptor

Even if your Raspberry Pi is a model B or B+ (which has a built in network connection) going wireless can have many advantages.
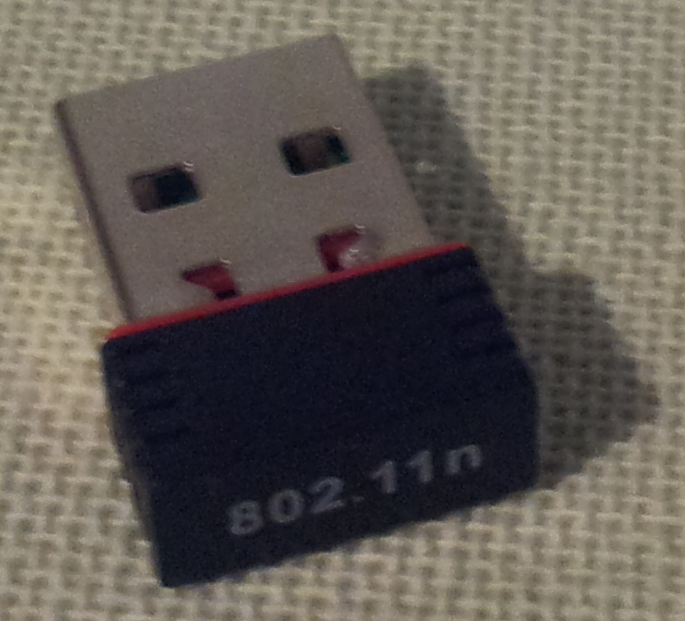
RaLink Wifi Adaptor

Not only does it make it easier to setup your Raspberry Pi in a location which is convenient for you (you don’t need to be next to a network socket or your router) but it means if you are using your Raspberry Pi remotely i.e. without a screen (see my Guide to Remote Connections) you just need to add power to run.

Model A Plus Wifi Setup

A Wifi adaptor will require some additional configuration, so be prepared to set it up before you use it (also be warned that you must plug in the Wifi dongle before you power up the Raspberry Pi – particularly for the older models – otherwise it will cause the Raspberry Pi to reboot).

The Pi-Kitchen can help greatly with the Wifi setup and can allow you to configure everything up front so when you install via NOOBS it will work immediately!

Although remember, if you are using an older model B or a model A (or A+) adding a USB Wifi dongle will take up a USB socket, so you may be limited to using either a mouse or a keyboard (or neither on a model A/A+).  However there are ways around this limitation too:

  1. Use a USB hub (ideally a powered one)
  2. Use a wireless keyboard and mouse set since they typically have a single USB wireless RF dongle for both
  3. You can also use a bluetooth keyboard/mouse – but remember you will need to configure these with the Raspberry Pi before you can use them.
  4. There are also keyboards which have a trackpad built-in (in place of the number pad), these use a single USB connection so are rather handy for the Raspberry Pi.

keyboard

2. Get a dedicated screen

ScreenSetup

Generally if you are planning on using the Raspberry Pi with your kids, then having a dedicated screen you can setup specifically for their use is by far the best solution.  Don’t forget that the whole idea of having a cheap computer is so that kids can experiment freely with it without worrying about causing damage to expensive parts or hogging the use of the family computer/TV.

TIP: For particularly young kids it can even help to have a 2nd setup for you to use, that way you can go through the same steps as them and if they get stuck demonstrate the answer.  By having a 2nd setup (even if you use a laptop and remote connection) you avoid the temptation to take hold of the mouse or keyboard and do it for them: you can show them and they can copy.  That way the sense of achievement is far greater as everything they do has been totally their own work.

When the Raspberry Pi was first released HDMI to VGA adaptors were rather expensive, bulky and often required external power.  This typically meant the best option was to find a screen which supported HDMI (such as a digital TV) and use that.

HDMI to VGA Adaptors:

HDMI2VGA

However these adaptors are now relatively cheap (£8 or less) very compact and will run directly from the Raspberry Pi.  These low cost adaptors are ideal if you have a spare screen available or an old computer, as HDMI compatible monitors are still quite expensive and it probably overkill to run a £30 computer with.  You may even find that your IT department or a local company will have unwanted VGA monitors or screens available, as newer PCs no longer support analogue connections they will still be ideal for the Raspberry Pi.

You may need to use slightly different settings with these adaptors, the config.txt file controls these settings (initially you can use hdmi_safe=1 to check everything is working).

disable_overscan=0
hdmi_drive=2

config_hdmi_boost=4

For more details see config.txt file.


DVI to VGA Adaptors:

6623OT_01_003

If you have a screen which supports DVI-D even better, as HDMI to DVI-D adaptors are around £2 at most and generally will result in a better signal (by remaining as a digital output).

Also remember if you use an adaptor for the HDMI output to convert to DVI-D or VGA audio will not be provided by the monitor so you may need additional speakers for sound (or a suitable cable if your screen has built-in speakers).

Again, there are a few other alternatives for display output:

Analogue Output:

The Raspberry Pi does have an analogue output (which can connect to older TVs though composite and SCART connections) but for most situations the display is low resolution and hard to see.  I would not recommend this method for general use except as a fall back when configuring things.  When using the Raspbian desktop you find that most programs will not physically fit on the screen making it impossible to click dialogue items or use them effectively.

Gert VGA Adaptor:

The Gert VGA adapter board is available from PiSupply (click on image to go to the shop).

The Gert VGA adaptor board is available from PiSupply (click on image to go to the shop).

This little board plugs (designed by the Raspberry Pi foundation’s Gert-van-Loo) directly onto the newer Model A+ or B+ Raspberry Pi GPIO header and allows you to drive a VGA monitor directly from the Raspberry Pi itself.  This allows you to connect directly to a VGA screen and also supports a 2nd display (via HDMI for example).  However it does use up most of the GPIO pins (4 are left over which can still used for hardware).

Note: If you have an older Raspberry Pi model (Model A or Model B) then this adaptor will not work (it required the newer 40 pin GPIO connection).

Use Remote Connections:

By using VNC, X11-Forwarding or SSH you don’t even need to have a screen (see my Guide to Remote Connections).

However, it is always helpful to have a screen available for those times when there is a problem connecting to the Raspberry Pi and you need to trouble-shoot the issue (you will fix your problem much quicker if you can see what is happening).

Generally if you are planning on using the Raspberry Pi with your kids, then having a dedicated screen you can setup specifically for their use is by far the best solution.  Don’t forget that the whole idea of having a cheap computer is so that kids can experiment freely with it without worrying about causing damage to expensive parts or hogging the use of the family TV/computer.

TIP: For particularly young kids it can even help to have a 2nd setup for you to use, that way you can go through the same steps as them and if they get stuck demonstrate the answer.  By having a 2nd setup (even if you use a laptop and remote connection) you avoid the temptation to take hold of the mouse or keyboard and do it for them: you can show them and they can copy.  That way there is a far greater sense of achievement as everything they do has been entirely their own work.

3. Get some educational resources!

Everyone needs to start somewhere and using some of the vast array of resources available is an excellent way to get started.

The MagPi Magazine

There are 30 issues of the MagPi available covering over 2 years of  the Raspberry Pi.

There are 30 issues of the MagPi available covering over 2 years of the Raspberry Pi.

This community led magazine is available for download for FREE from the MagPi website, and is a perfect resource for those starting out with the Raspberry Pi and also to get some more advanced ideas too.  You can support the MagPi by purchasing printed versions of the magazine from the many retailers (see the site for details).

Raspberry Pi foundation educational resources

The Raspberry Pi resources are split into three sections: Teach, Make and Learn.

The Raspberry Pi resources are split into three sections:
Teach, Make and Learn.

The Raspberry Pi website has a whole section of resources available, a perfect place to get started and learn the basics of using the Raspberry Pi and starting your own projects.

Get a book

For those bigger projects and a more complete guide a good book makes an excellent resource.  Ideally you will find that you will often find the solutions to what you need just by grabbing it off the shelf and looking the answer up (a good reference book will keep being useful long after you’ve read it once).

There are lots of great Raspberry Pi books out there, but I would like to recommend my own one as a comprehensive guide to what you can achieve with the Raspberry Pi.

Raspberry Pi Cookbook for Python Programmers

Get the most out of the Raspberry Pi and unleash its huge potential using Python.

You can read more about in the sections above on this site, and also see what other’s think by reading the excellent reviews (of which I am very thankful for) I’ve had on Amazon.  The book is also available from other retailers, or direct from the Packt website.

4. Get started with hardware

The Pi-Stop

LogoDesignVertOp

As any hardware or embedded software engineer will tell you, the first step to any project is to get some lights flashing.  For kids the ability to control something which they can physically pick up and handle is a huge incentive and can make following guides and tutorials far more engaging.

Pi-StopGuides

The Pi-Stop is an excellent starting point, fitting directly onto the Raspberry Pi it provides a excellent starting point for interfacing with hardware on the Raspberry Pi.  There are lots of resources available to get you started and also a number of workshops and tutorials to follow.

Python Pirate Workshop Setup - 3 small treasure chests, 1 large (with gold coins), Combination Padlock, 4 Raspberry Pi with Pi-Stops (plus PSU/SDCards), Maps and Worksheets

The Pi-Stop was jointly designed by PiHardware (this site!) and 4Tronix as a low-cost and easy to use add-on for workshops and home use.  Of course once you’ve got used to controlling hardware they are excellent for debugging and indicating different operations while the Raspberry Pi is running, and can also be used with other micro-controllers too.

They are available from 4Tronix and now also from CPC (Farnel).


More tips to supercharge your Raspberry Pi coming soon!

Latest additions to the Pi-Kitchen…

Posted: January 3, 2015 in General

PiKitchen

The Pi-Kitchen grows to 10 recipes.  I’ve also tested with the latest version of NOOBS 1.3.11 and everything works as it should.  The Pi-Kitchen allows everything to be setup automatically, so all my settings are recreated following a clean install of NOOBS.

Recipe: 007-Create Network Share

This recipe allows the Raspberry Pi to share the Pi home directory on the network as a Windows Shared Folder.  This makes it easy to manage your files and back them up etc.

For more details see…Recipe: 007-Create Network Share

Recipe: 008-VNC

This recipe enables VNC so we are able to remote connect and control the Raspberry Pi using a VNC connection.

For more details see…Recipe: 008-VNC

Recipe: 009-Map Network Share

This recipe allows the Raspberry Pi to map a Windows Shared Folder as a local directory.

For more details see…Recipe: 009-Map Network Share

Recipe: 010-Scratch GPIO

This recipe allows the Scratch GPIO to be setup as part of the Pi-Kitchen.

For more details see…Recipe: 010-Scratch GPIO

More Pi-Kitchen Recipes!

Posted: December 28, 2014 in General

PiKitchen Work on the Pi-Kitchen continues, here are the latest (and very useful) recipes added to the collection:

004-No Raspi Config

This recipe allows the raspi-config program which normally runs on first power up to be stopped from running (otherwise this may cause our automated startup scripts not to run/cause the Raspberry Pi to need user input).

For more details see…Recipe: 004-No Raspi Config

005-Wifi

This recipe allows the Wifi to be pre-configured using the Pi-Kitchen so that the Raspberry Pi is able to connect to your wifi network on first boot.

Note: This particular recipe does require a working wired network connection, for off-line installation of wifi drivers see the next recipe (Recipe: 006-Wifi Driver Configuration).

For more details see…Recipe: 005-Wifi

006-Wifi Driver Configuration

This recipe allows the Wifi Drivers to be installed as part of the Raspberry Pi first boot.  This allows the Raspberry Pi to automatically install the Wifi Drivers, configure the Wifi settings and connect when it starts up.

Note: Although this requires a little more configuration upfront it does mean you do not need to connect to the internet to install the Wifi drivers.  This recipe allows the driver files to be stored on the SD-Card so the Wifi can be setup without needing a wired network connection (just power up and wait for it to install).

For more details see…Recipe: 006-Wifi Driver Configuration


These three recipes (particularly the last one) mean that once you have a properly configured Pi-Kitchen SD-Card you can put it into your Raspberry Pi, add the Wifi dongle and power it up.  It will then install everything needed for it to connect to your Wifi network, allowing you to use remote connections to control it from another computer on your network.

Note: If you configure your router to allocate an IP address based on the MAC address (a unique id for the device), the Raspberry Pi will end up with the same IP address each time (for a particular Wifi dongle). So the address stays with the dongle (even if you connect it to a different Raspberry Pi).

Model A Plus Wifi Setup

Pi-Kitchen can auto-configure the Wifi so it is up and running on first boot!

This is such a useful setup and is perfect for the new Model A+!


Testers Wanted:

If you spot anything, or something doesn’t quite seem to work as it should then please let me know. While I test things as much as I can, I only have so much time available so sometimes I will miss things.

If you have different Wifi adaptors available which you have tested with the recipes then send me the details and I can add them to the Pi-Kitchen.

I’m keen to make the Pi-Kitchen as easy as possible to use, so any problems get in contact.

New Pi-Kitchen recipes!

Posted: December 18, 2014 in General, Pi-Kitchen, Raspberry Pi

PiKitchen

The Pi-Kitchen has been progressing exceptionally well, and I can introduce some new recipes to the cupboard:

000-NOOBS Setup

This recipe will allow easy setup of the NOOBS configurations and allow you to switch between GUI based installs and automatic ones, as well as selecting which custom flavour you want to automatically install.  It also provides a way to quickly add the standard set of Pi-Kitchen flavours to a new clean NOOBS card.

It’ll even allow you to pre-select the display output NOOBS will use (although NOOBS 1.3.10 has a bug which ignores the video setting from the cmdline file, this should work for other versions of NOOBS, including any new ones).

For more details see…Recipe: 000-NOOBS Setup

001-Startup

This is a recipe which will allow a huge amount of customisation to your setup.  Enabling scripts to run on first boot (for automated installations etc), scripts to run on start-up and a run-once option (for installations which need user input) this recipe will be very useful.  It even allows scripts to be automatically from from the RECOVERY partition (so you can drop files on there from windows and they will run next time you boot your Raspberry Pi).

For more details see…Recipe: 001-Startup

002-Boot Display

This allow you to pre-set a number of display settings (and other settings) which are set in the config.txt file of the boot partition.  This includes a script, switchdisp.sh which allows easy changing once installed on the Raspberry Pi.

Note: This also fixes the forced HDMI settings which NOOBS 1.3.10 adds, even when composite video out is selected.

For more details see…Recipe: 002-Boot Display

003-Direct Network

This implements a recipe which allows easy setup of a direct network connection between a PC or Laptop and the Raspberry Pi (including sharing the PC’s Wifi network connection).  Once you have your configuration setup, you can install and connect to your Raspberry Pi, right out of the box.

Laptop connected to internet via WiFi, share Wifi using ICS with Wired Connection, use Wired Connection address as Gateway (and part of RPi IP address).

Laptop connected to internet via WiFi, share Wifi using ICS with Wired Connection, use Wired Connection address as Gateway (and part of RPi IP address).

This also includes a script switchip.sh to change configurations and to select standard network settings (as required).

For more details see…Recipe: 003-Direct Network


Lots more on their way! 🙂

A workshop later…

Posted: December 1, 2014 in General

I’ve been progressing well with the Pi-Kitchen, however I put development on hold for a week while I got ready for the @Bristol Digimakers event.

Python Pirate Digimakers

Python Pirate Workshop for Digimakers November 2014


The workshop had a pirate theme, although the plans went well, the workshop was far too long to fit comfortably in the allotted hour.  Added to the lessons learnt, I know to adjust things next time.  I think everyone enjoyed it anyway and many thanks to all that came along, it was a fantastic day.

However, I hope the workshop materials will make a good on-line resource, details of which are now available:

Lessons -> Pi-Stop Workshops -> Legend of the Python Pirate

It provides details on running it as the full workshop (which had simulated lighthouses displaying the signals) as well as a version which has all the signals and codes ready on the treasure map so you don’t need the lighthouses.

Kudos to those who already knew all about Morse code too!  Very impressed.


Set-up of the workshop was greatly helped by having the Pi-Kitchen on hand to automatically set-up the four lighthouses with preconfigured scripts running on power-up (details will be in the next recipe..just a few tweaks to be made first).

PiKitchen

Also, the majority of this Raspberry Pi Python workshop was written using an Arduino Nano…one loaded with Brian Lavery’s Virtual GPIO, which allowed me to write and test the Python scripts directly on a PC.  The same Python scripts can then be run on a Raspberry Pi without any modifications!

Arduino Nano + mini-USB + Pi-Stop + Laptop = Easy Development!

Arduino Nano + mini-USB + Pi-Stop + Laptop = Easy Development!

The only difference to a standard Raspberry Pi Python script is shown below.  This detects if the RPi.GPIO module is available or not and allows us to set different pins as necessary.

try:
  VIRTUAL = False
  import RPi.GPIO as GPIO
except ImportError:
  VIRTUAL = True
  print (">>>Entering Virtual GPIO Mode")
  import virtGPIO as GPIO

if VIRTUAL:
  #HARDWARE SETUP
  LED=[4,3,2] #RED, AMBER, GREEN
else:
  #HARDWARE SETUP
  # Model+ P1
  # 2[=========XGYR]26
  # 1[=============]25
  LED=[26,24,22] #RED, YELLOW, GREEN

Very useful!

The last few weeks I’ve been very busy working on a new concept which I’ve been using for months.  The groundwork is now in place and I’m ready to start sharing some of the results.  I hope that people give this a try and find it useful (I know I have and is now something I use all the time).

It also lives on GitHub, so I hope it will also grow as others submit their own recipes.

Enjoy…


Introducing the Pi-Kitchen

Have you created that perfect setup on your Raspberry Pi and then needed to update or reinstall your card?

Ever wanted to share your creations with others without having to go through all the trouble-shooting that typically comes with it?

Would you like to be able to use the same setup over and over without needing to clone SD-Cards?

Do you want your Raspberry Pi SD-Card experience to just be simpler right from the start?

Well, welcome and come into the Pi-Kitchen!

The aim of the Pi-Kitchen is to provide a new way to customise and build your SD-Card even before you power up your Raspberry Pi. It should allow you to bake your own bespoke installation which is ready to go right off the first power up, up to date and fully loaded with whatever you desire.

The Pi-Kitchen Concept

The overall concept for using the Pi-Kitchen is to provide a wide selection of “ingredients” from which you can select and include in your very own special “recipe” for your own perfect SD-Card.

In theory, you will be able to mix and combine the various ingredients (=a particular feature/setup) with other ingredients, to create that perfect blend of special spices to go into your recipe (=your desired setup).

The key difference to the standard method of building custom images is the that source files (the ingredients) are kept separate to the installation (the recipe). This means we are free to mix and combine them how we wish.

Since NOOBS supports the installation of flavours we can (if we want to) create a range of flavours each using a different recipe, all drawing from a common set of ingredients.

The Pi-Kitchen works using standard files making it easy to edit, adjust and re-configure your setup (even from OSX/Windows or directly from your Raspberry Pi). Of course once you are happy, you can also tar-ball (compress) everything as desired into a single package.

How does it work?

The Pi-Kitchen uses a small modification to the scripts used by NOOBS to perform an additional step in the installation process, allowing us to inject our own files into the final installation (without having to edit the standard images or create custom flavour images).

In the most basic setup, we replace one file in the standard NOOBS install, and then just add the files we need.

With thanks to…

A huge thanks to Kevin Hill who created NOOBS-config which performs the magic, and has kept modifying it to fit in with my ideas/plans for it.

Also thanks also goes to the NOOBS team (Andrew Scheller etc) who created NOOBS in the first place.

NOTE: We do allow the Pi-Kitchen to break the golden NOOBS rule about not messing with the recovery partition (and in some cases we are actively encouraging it) so these methods will probably remain outside of the standard NOOBS system.

What can the Pi-Kitchen do?

By using this very simple idea, we can perform lots of exceedingly useful operations:

  • Injection of network and WiFi settings so we can have full networking and remote access enabled immediately.
  • Automatically enable the settings for a direct network cable link to use the Raspberry Pi with a laptop/PC
  • An automated install script which we can trigger on the first power up of the Raspberry Pi following the NOOBS installation (so we can install SAMBA, VNC etc as needed)
  • Enable a bluetooth keyboard to work on the first boot
  • Automatically run background scripts to check for and respond to attached hardware (such as hardware buttons)
  • Build stand-alone projects which can be quickly deployed by selecting a specific OS flavour
  • Possibility to setup scripts which automatically run on start up
  • Option to setup mapping of data and recovery partitions automatically
  • We can create a range of different flavours which then can install a unique combination of ingredients (=a particular feature/setup). For example, you could create one flavour for a workshop and another flavour which runs an automated demonstration of the workshop as soon as it is switched on
  • Create installations which can be run without a network but can be easily updated when required.
  • Pre-load the installation with relevant data-sheets, resource materials or web-links.
  • Ability to share and develop common ingredients with others.
  • and probably a lot more we’ve not tried!

The bonus is, that once you have got something setup and working, you don’t need to keep doing it each time you create a new installation or perform clean install.

Get baking!

Take a look in the subsections for examples and ideas, and bake your first SD-Card.

Pi-Kitchen: Getting Started – explains how to setup a very basic Pi-Kitchen setup and how everything works.

Pi-Kitchen: Creating Flavours – explains how to extend your setup to use flavours, expanding your Pi-Kitchen to support multiple setups.

Pi-Kitchen: Automatic Installations – explains how to configure the Pi-Kitchen to perform an automated install of your preferred setup.

Recipe 001 – Direct Network – The first recipe for the Pi-Kitchen finally provides an out-of-the-box direct networking solution (based on the Super Easy…Direct Network Connection guide).

I will have a Quick Start guide coming very soon too, as well as lots more of the recipes I’ve been using on my own Raspberry Pi!

Also don’t forget to let me know how you get on.

UPDATE: The Pi-Kitchen: Quick Start is now available too!